Saturday, December 28, 2013

Batmobile Fender Work Continues, Tardis Paint

As new years eve rapidly approaches, I'm on a mad man's mission to squeeze out every last ounce of potential productivity in the remainder of 2013. Today also featured a reunion of Team Tardis, an outfit that has been on an unintentional hiatus for the past couple of months. Executive summary: Awesome.

The day started with me tackling the other fender, using the same bondo squish style technique I used the other day on the opposing fender. Same tactic, hopefully the same great results.

Here's what the repaired one looks like, the one I squished yesterday.

This is after a bit of sanding and clean up, where I got rid of all the excess fiber and resin. Overall I am extremely pleased with the results. It still needs a bit of fine tuning around the edges, but it really turned out wonderfully. It was based on the success of this piece that I gained the confidence to tackle the other fender.

Here's another shot of the fender that kind of shows a different view of how the top is now pretty flat. It was NOT like this before I started! I promise you this!!

the other big accomplishment of the day was getting some paint finally laid down on Ewan's Tardis. We had to buy a new spray gun, as mine was pretty well gummed up and we couldn't seem to get it apart to clean it out. A quick trip to Home Depot (and a stop at Five Guys along the way) we were back in business.

We did the roof first, and it turned out really nicely.

We took a calculated risk and kept painting after the sun had set. Mixed results, to be sure. Word of advice: paint in warm weather, and/or daylight.

Despite a few setbacks, overall it was an extremely busy and productive day. Much was accomplished. Even better, once I got home, I sewed up my coveralls. This will no doubt also contribute to keeping me warm during future build days.

Fender Work and Support Boxes

Today was definitely a "two steps forward, one steps back" kind of day. I started out pretty strong by putting another layer of glass on the rearmost support mount boxes. These are right at the tail end of the rear fenders. These should help lift up the butt-end of the shell a little bit, and correct about a vertical inch-worth of sag that is in the kit.

My next task for the day was to build some support lips for the two front fender add-ons. The idea is that I would fix the fenders in place, then go up inside the shell and lay down some fiberglass on top of the fender, thus creating a lip that can be used to secure the fenders to the body. The idea seemed simple enough to me.

I spent a lot of time with my disk sander, dremel tool and coping saw, making sure that the fender fit pretty snugly into the shell. My plan was to use a "bondo squish" style method with some cabosil thickened epoxy resin to fill in the gaps and make them perfect. I got the drivers side all figured out, clamped in, and laid in some fiberglass.

Then I switched over to the passenger side, and that's when things kind of fell apart. What I realized is that not only are the two sides of the car asymmetrical when it comes to the front fenders and headlight recesses, but also that the fender extensions are VERY wonky. They are not flat on the top, nor are they flat on the bottom. Flat on the bottom I can deal with, as nobody will ever see that. But not flat on the top is a problem, as that effects the way the fender fits into the shell, and it will also be visible. I quickly pulled out the drivers side fender addition and wiped off as much fiberglass resin as I could find. NOT a fun process.

The next step was to create a flat top surface for the passenger side fender. I did this by again doing a bondo-squish method. I laid some wax paper down on my work bench ( a pretty darn flat surface. Well, flat enough for my purposes) and first put down some epoxy resin with a few strips of matting. The matting was cut to roughly cover the most drastic void on the fender.

I then mixed up a big batch of resin and put LOADS of cabosil in it, turning it into a thick paste. I laid this down on the wax paper, on top of the fiberglass I had already set down, and built it up into roughly what I beleived to be the shape of the void on the fender. Then I pushed the fender down on top of it. SQUISH! The thickened resin filled the void perfectly and completely.

In this picture you can really see how big of a void there was to fill. A bit more than a quarter of an inch in its worst places.

Now I just need to wait until the resin cures, and I can pull the fender off the table, sand it down a bit, then try attaching it to the body again.

Overall a very busy day, and a lot of really good experience. BUT not the amount of progress I was hoping for.

Tuesday, December 10, 2013

MattMobile Update - Support Boxes and Misc.

Lots and lots and lots of stuff has happened since my last blog post. If you have not been following my youtube videos that document my build up, that might be a good place to start. Much of what is contained on this page is duplicated in the videos. But then, there's also some new dope here :D

Links to the latest videos will be at the bottom of this blog post.

First up, let's take a look at how the shop looks recently.

The main things worth noticing here are the fact that the shop is pretty clean, and I have organized all of my white boxes and tools and stuff along the back wall.

My three primary projects are pictured here. You can see the Tardis, the Harley, and the Batmobile. I took this pic shortly before I repositioned the batmobile into its current resting place.

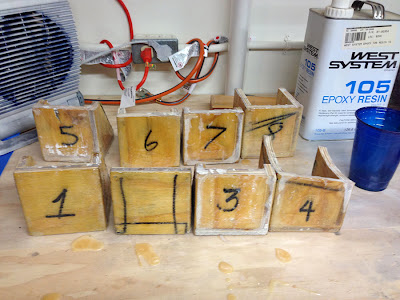
The big push this month has been to get the shell mounted on the body. To do this, I built these Bo-designed boxes for the inside of the shell. The idea is that we glass these into the shell, then build out metal support arms that go from the shell to the underside of these boxes. In between the box and the arm will be a rubber bumper.

This picture shows very clearly how the boxes have been installed into the frame. The one at the top of the picture is the most recent one I installed, and the one at the bottom was the FIRST one I glassed in. It certainly appears that along the way, my technique improved greatly.

Glassing in those front boxes was NOT glamorous work. In fact, it was pretty excruciating. Getting inside the car and up under the hood with only a tiny bit of room to crawl around was physically pretty daunting. Thank goodness I'm not claustrophobic. In order to do my work safely, I was wearing safety goggles and a head lamp, and I would often wear a respirator. Pretty snazzy outfit!

Few things better than having a girlfriend around the shop not only to provide assistance, but also to take pics of me when I'm unable to.

If you want to see some of Jackie's projects, check out her facebook page here:
https://www.facebook.com/HappyGoJackie

Even better, check out some of the Smosh videos she is featured in:

I had to make sure the shell was positioned VERY precisely on top of the frame, so that when we mount the arms to the boxes, it's in the right position. It was a very laborious task. Here you can see where I've put a level on the hood of the car to make sure it sits properly. Pretty darn close!

I also built a new work bench along the way.

Work was interrupted for a while with a trip to NorCal, where we drove through some red wood forests, and also saw a pretty amazing sunset.

I actually put a video of this sunset on youtube, so be sure to check it out!

One of the tasks I need to attend to shortly is the chopping off of the top of that metal post that runs vertical to the frame.

It can (and does) get pretty cold in the shop this time of year. Here, Jackie is demonstrating a new technique she is experimenting with in order to stay warm.

A recent trip to Harbor Freight yielded this cart, which has already earned its money by keeping my welding torch and related supplies well organized and mobile.

This picture shows an example of the stacks of wood I am using to temporarily position the shell at its desired height.

Lastly is the most recent picture of the car. You can see blue tape all over the place where I have made notes about the height of the car.

Monday, December 9, 2013

Harley Davidson Ultima Restoration

For those of you who were concerned that BoTheWelder is a one trick pony, allow me to present to you his latest accomplishment, the restoration of this amazing Harley Davidson.

UPDATE - As of July 31, 2015, this build is done. Check out this video of the bike being lit up.

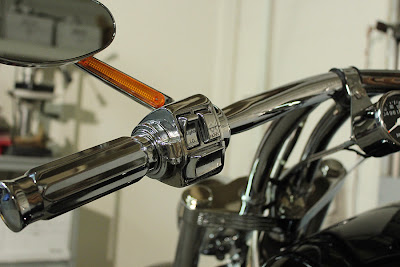
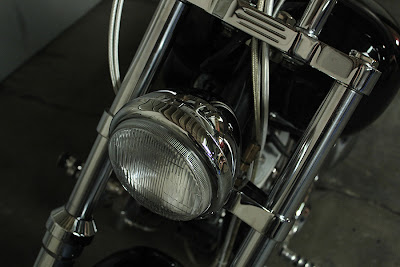
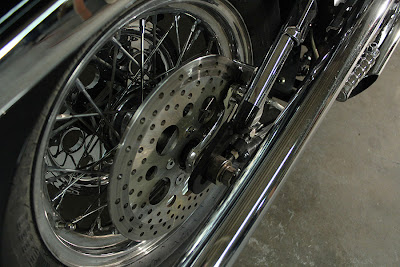
Regular readers will already know that I'm a huge fan of Bo's work, and this bike does not fail to impress. I functioned purely in an advisory capacity on this project, though I guess I did provide some much needed capital and a place to work. But this baby is all Bo. We purchased this bike from a seller in Riverside. While I would never say that the bike was in "sad" shape, it certainly needed some love. The original paint job was pretty nasty, and much of the chrome was faded or in need of repair. The electrical system was also pretty fried, and the gas tank had some interior troubles. Bo took care of all of these issues, and here it stands in its current glory.


If you're new to my blog, please be sure to check out the latest episode of my Batmobile build blog, The Rise of The MattMobile.