I once again turned to my friends at http://www.jamestowndistributors.com for all my fiberglassing needs. I ordered a gallong of West Systems 105 epoxy, and a quart of the 205 fast hardener.
This is the same stuff I used when I was making the mother mold for my cape about a year ago. The stuff is very easy to work with, doesn't smell awful like common off the shelf fiber glass products do, and is reslient as all getup.
It is a tad on the expensive side, but when you buy at Jamestown it's about half the cost that I have seen it go for in stores.
I will use this to make the negative mold of the cape material. The output from that mold will be used on the boots.
Thursday, March 25, 2010

Laser Etching Continues
Since I'm all jazzed about my new approach to the boots, I jumped on it and got straight to work when I got home.
The first thing I did was slather on another layer of Bondo onto the sole, in an attempt to build up the heel a bit more. Probably one more slather is needed, and then I will be done with that part. I also repaired the crack that got into it using that super glue gel I picked up earlier today at HobbyTown USA.
But the big news is that I banged out the artwork for the micro-s panel for the boot, and sent it off to the laser cutter. I will be getting a rigid piece made, which I will then mold, and pour urethane into. Should be really nice and easy.
The first thing I did was slather on another layer of Bondo onto the sole, in an attempt to build up the heel a bit more. Probably one more slather is needed, and then I will be done with that part. I also repaired the crack that got into it using that super glue gel I picked up earlier today at HobbyTown USA.
But the big news is that I banged out the artwork for the micro-s panel for the boot, and sent it off to the laser cutter. I will be getting a rigid piece made, which I will then mold, and pour urethane into. Should be really nice and easy.
Brainstorming About The Boots
Today on my lunch break I went to Home Depot to pick up some supplies. I got some more Bondo, a coping saw, and a new file. I also hit up HobbyTown USA for some superglue. I got a bottle of thin, a bottle of thick, a bottle of “undo”, and a spray bottle of the kicker.
But that’s really not the interesting part. What is interesting about this outing is what I thought of during it. I got to thinking about the composition of the boot, and how it all goes together. There are actually two types of embossed leather on it. One is the Micro-S pattern that is also found on the shield. The other is the inverse of the cape outer shell. Based on all of the research and pricing I’ve done, getting those two embossings done is well outside of the budget of this project. On the way into Home Depot, it occurred to me that I already have the cape pattern, and it would be very easy to produce the inverse of it.
And that’s when it hit me. The thing that has been driving the boot development is the assumption that I have to have them done in leather. But if I discard that assumption, and accept that I can make the embossing patterns out of something else, like urethane, it’s a whole new picture.
I quickly ran through my head what would be involved and realized just how completely simple it would be to do in urethane, using a CA Boot as a base. All I would need to do is make a positive master mold of a foot or two of cape material, and then get a panel of the micro-S pattern laser etched, and pull a mold off that. Those things are EASY, and are inside my skillset and toolset. After thinking this through, I got really excited about it, and realized just how easy it will be to make this happen. It’s borderline simple actually, and there’s only ONE component I would need to acquire to make it happen, and that’s the laser etched Micro-S pattern. And that’s a no brainer. I’ve already got it drawn up in illustrator, and already know of a cutter than can output it for me, as they’ve already done a sample for me for a different part of the project.
I can even use techniques I learned while making the cape to help. I was thinking I can pour up a thin layer of urethane, and make it really opaque using the stuff I found, then back it with fabric for strength and flexibility. I also know that my new sewing machine can sew through the stuff, so if I really wanted to sew parts of it together, I totally could.
This all got me really excited, because I think I can bang it out pretty quickly and get REALLY good results. I’m super excited right now. The other benefit is that this will not only be really inexpensive, but I will also be able to help out fellow collectors, since I will have molds for boot components in case they are interested. VERY cool.
But that’s really not the interesting part. What is interesting about this outing is what I thought of during it. I got to thinking about the composition of the boot, and how it all goes together. There are actually two types of embossed leather on it. One is the Micro-S pattern that is also found on the shield. The other is the inverse of the cape outer shell. Based on all of the research and pricing I’ve done, getting those two embossings done is well outside of the budget of this project. On the way into Home Depot, it occurred to me that I already have the cape pattern, and it would be very easy to produce the inverse of it.
And that’s when it hit me. The thing that has been driving the boot development is the assumption that I have to have them done in leather. But if I discard that assumption, and accept that I can make the embossing patterns out of something else, like urethane, it’s a whole new picture.
I quickly ran through my head what would be involved and realized just how completely simple it would be to do in urethane, using a CA Boot as a base. All I would need to do is make a positive master mold of a foot or two of cape material, and then get a panel of the micro-S pattern laser etched, and pull a mold off that. Those things are EASY, and are inside my skillset and toolset. After thinking this through, I got really excited about it, and realized just how easy it will be to make this happen. It’s borderline simple actually, and there’s only ONE component I would need to acquire to make it happen, and that’s the laser etched Micro-S pattern. And that’s a no brainer. I’ve already got it drawn up in illustrator, and already know of a cutter than can output it for me, as they’ve already done a sample for me for a different part of the project.
I can even use techniques I learned while making the cape to help. I was thinking I can pour up a thin layer of urethane, and make it really opaque using the stuff I found, then back it with fabric for strength and flexibility. I also know that my new sewing machine can sew through the stuff, so if I really wanted to sew parts of it together, I totally could.
This all got me really excited, because I think I can bang it out pretty quickly and get REALLY good results. I’m super excited right now. The other benefit is that this will not only be really inexpensive, but I will also be able to help out fellow collectors, since I will have molds for boot components in case they are interested. VERY cool.
Wednesday, March 24, 2010
Sole Is Shaping Up
Tonight I spent some time on the sole. It's messy work, because now I'm sanding and filing. That always makes a mess, and bondo really stinks.
Here's the sole as it was when I got started. I had slathered on a few more layers, and given it enough time to harden up properly.

I tried to draw some lines on the thing, but because the bondo was so knobby and uneven, it just wasn't working. I spent a few minutes shaving off the worst offenders. Here's how it looked when I started marking it up.


Thanks to some online friends, I have some REALLY high def pictures of the boots and soles, and here I'm using a great shot to map out how I think the sole should look. Because the basic shape of the foot of my CA Boot is pretty different than the boots they made for the movie, there will be some differences. The main one is that the toe on my boot is more pointed than the movie boot, which is more square.

After about an hour of work using the dremel with the cutoff wheel and a few files, here is where I am.

Once again, I'm surprised at how well it is turning out. Granted, it is rough right now, and there's lots of work to be done, but I think the overall concept of development is going to pan out.
Here's the sole as it was when I got started. I had slathered on a few more layers, and given it enough time to harden up properly.

I tried to draw some lines on the thing, but because the bondo was so knobby and uneven, it just wasn't working. I spent a few minutes shaving off the worst offenders. Here's how it looked when I started marking it up.


Thanks to some online friends, I have some REALLY high def pictures of the boots and soles, and here I'm using a great shot to map out how I think the sole should look. Because the basic shape of the foot of my CA Boot is pretty different than the boots they made for the movie, there will be some differences. The main one is that the toe on my boot is more pointed than the movie boot, which is more square.

After about an hour of work using the dremel with the cutoff wheel and a few files, here is where I am.

Once again, I'm surprised at how well it is turning out. Granted, it is rough right now, and there's lots of work to be done, but I think the overall concept of development is going to pan out.
Final Laser Cut Sample Arrives
Great news today on the MultiPass front.
Today I received the second sample of the laser cut parts, which included a few changes I made to the drawings based on the first sample.

The kit is perfect! All of the parts are really nice and crisp, and they got the thicknesses right. So I am really happy.
Most importantly, the LED fits PERFECTLY inside the housing. This was one of the critical changes I made to my drawings, and it worked like a charm.

Immediately after opening this, I fired off an email to Mary at RMS Laser and ordered the run of kits to be completed.
Today I received the second sample of the laser cut parts, which included a few changes I made to the drawings based on the first sample.

The kit is perfect! All of the parts are really nice and crisp, and they got the thicknesses right. So I am really happy.
Most importantly, the LED fits PERFECTLY inside the housing. This was one of the critical changes I made to my drawings, and it worked like a charm.

Immediately after opening this, I fired off an email to Mary at RMS Laser and ordered the run of kits to be completed.
Bondo For Breakfast
No pics this post, just wanted to chime in and say that I did another three layers of bondo this morning on the boot sole. I'm going to need more bondo! I may also switch to some other material, seeing as how bondo smells really bad.
But it's coming along nicely. I'm not looking forward to getting bondo dust all over my apartment, but that's the price you pay for fun projects!
But it's coming along nicely. I'm not looking forward to getting bondo dust all over my apartment, but that's the price you pay for fun projects!
Tuesday, March 23, 2010
Put A Little Sole In Your Bootie
Clever title, yes?
Now, I'm no bootmaker, so I'm going to try to be really non-judgmental in what I'm about to say. Both Siam Leather AND Indy Magnoli have told me they will be unable to make the boots based solely on the pictures I have.
Since I'm not a cobbler, I'm not really in a position to tell them that they should be able to. But if they tell me they cannot, I will just have to take their word for it. But at this point, I've exhausted all of the options I have that I know of. So it looks like I'm going to have to tackle the boots on my own.
The good news here is that just yesterday I tested my sewing machine with a leather needle in it, and it worked pretty well. I think I can pull it off. I won't be making the boots from scratch, but will instead just be building a facade up around a pair of CA Boots that I already own.
Polou Laser Cutters can do laser etching on leather, and so does my other laser cutter. My thought is that I can do the micro-S engraving that way, and then basically just wrap it around the front of the boot.
But it's the soles that are going to get me in the end. I was driving home from work tonight and came up with an idea. My talents do not lie in sculpting with clay. I'm just not good at it. But I CAN shape something that is rigid, using tools like a dremel, some files, and sanding paper. So I got it in my head to try to put together something rigid for the sole.
I made a trip to a local hobby shop and Home Depot, and came home to get started.
Here's what I've got. A CA boot, some bondo, some latex gloves, popsicle sticks, and some low tack painters tape.

I start by wrapping tape around the part of the boot I want to schmear. I then sprayed it with a quick blast of mold separator, which is basically spray on vasaline.

I mixed up some bondo, then just started slathering it on using the popsicle sticks. Yes, the boot was on my foot at the time to make sure it filled out properly.

I've got to say that I was stunned at how well it turned out. The rigid positive pretty much slid right off, and is looking REALLY great.


I will build it up a bit more with more bondo, getting the general shape of the sole, and then I will start going in with some tools to take it down to the proper shape. After the results I got tonight, I'm actually starting to think that making this sole by myself just might be possible.
The extra cool thing is that once I have it molded, I can make copies for any of my friends who happen to wear size 10.5 CA Boots! NICE!
Now, I'm no bootmaker, so I'm going to try to be really non-judgmental in what I'm about to say. Both Siam Leather AND Indy Magnoli have told me they will be unable to make the boots based solely on the pictures I have.
Since I'm not a cobbler, I'm not really in a position to tell them that they should be able to. But if they tell me they cannot, I will just have to take their word for it. But at this point, I've exhausted all of the options I have that I know of. So it looks like I'm going to have to tackle the boots on my own.
The good news here is that just yesterday I tested my sewing machine with a leather needle in it, and it worked pretty well. I think I can pull it off. I won't be making the boots from scratch, but will instead just be building a facade up around a pair of CA Boots that I already own.
Polou Laser Cutters can do laser etching on leather, and so does my other laser cutter. My thought is that I can do the micro-S engraving that way, and then basically just wrap it around the front of the boot.
But it's the soles that are going to get me in the end. I was driving home from work tonight and came up with an idea. My talents do not lie in sculpting with clay. I'm just not good at it. But I CAN shape something that is rigid, using tools like a dremel, some files, and sanding paper. So I got it in my head to try to put together something rigid for the sole.
I made a trip to a local hobby shop and Home Depot, and came home to get started.
Here's what I've got. A CA boot, some bondo, some latex gloves, popsicle sticks, and some low tack painters tape.

I start by wrapping tape around the part of the boot I want to schmear. I then sprayed it with a quick blast of mold separator, which is basically spray on vasaline.

I mixed up some bondo, then just started slathering it on using the popsicle sticks. Yes, the boot was on my foot at the time to make sure it filled out properly.

I've got to say that I was stunned at how well it turned out. The rigid positive pretty much slid right off, and is looking REALLY great.


I will build it up a bit more with more bondo, getting the general shape of the sole, and then I will start going in with some tools to take it down to the proper shape. After the results I got tonight, I'm actually starting to think that making this sole by myself just might be possible.
The extra cool thing is that once I have it molded, I can make copies for any of my friends who happen to wear size 10.5 CA Boots! NICE!
Sunday, March 21, 2010
Prototype Cape Is DONE. Dee-Oh-Enn-Eee DONE
I'm very happy to report that at 5:14 EST, I finished my prototype Superman Returns cape. Much rejoicing is currently in process.
I must confess first that I was losing faith in my sewing machine. I've been growing continually frustrated with its apparent limitations, and the fact that the string keeps breaking.
Turns out, like any tool, you need to know how to use in order to get good results out of it. I'm VERY fortunate to have purchased this sewing machine from a seller who is really happy, willing, and able to provide all kinds of support for his product. And quick too! I've been firing off question after question, and he belts answers right back. My biggest complaint over the last two days has been the machines seeming inability to sew through a couple layers of the cape fabric. The seller recommended a few settings to switch, and more importantly to switch to a size 18 heavy duty needle. I went down to Jo-Anne's and got one this morning.
Allz I can say is WOW! Once I put that needle on and jacked the tension all the way up to 9 (no, not to 11) I was PLOWING through multiple layers of the stuff. It was sick. Knowing that I and my machine were now working toward the same goal, it was time for the final assembly of the cape.
A tip I picked up from a website was to use binding clips to hold your fabric together. They are faster to put in and remove than pins, and less hassle too. And considering the thickness of this fabric loaf, I figured they would work great. I picked up a pack of fifty from Office Depot for like three bucks, and stacked up and positioned my material just how I wanted to sew it.

And that was really all there was to it. I had the final assembly done in just a couple of minutes. I ran my seam over it twice, just to reiforce it, and it turned out great. Here's the final piece.

And a close up of the collar.

Please disregard the color differences. Though I am happy with the outer shell and inner lining of the cape, the stabilizer and cape clips are all wrong. Just temporary.
A few thoughts as a post-mortem on the prototype cape. First of all, I'm VERY happy to have it done. I'm also very happy that I made a prototype, and did not put all my eggs in one basket for this. If I was working against a timeline and this was my final result, I would be in trouble.
Why? Overall, I'm not happy with the weight. The thing is frickin' heavy. So much so that I would need to devise some kind of rig under the costume to keep it in place, and it would probably be wildly uncomfortable to wear after an hour or so. I have two things I can do to remediate this. First of all, I'm working on the opacity of my latex. Regular readers will be familiar with my struggles in this area. I think if I can get the latex down to three layers plus an adhesion layer, that will cut the weight down significantly. I think this cape has something like six or seven layers. Second, the inner lining is pretty heavy. I need to switch to a lighter weight material. Now that I am much more comfortable with the process of dying, a lot of opportunities have opened for me. All I really need to do is find a fabric that I like in white, and I can make it happen.
I also learned a lot about how to assemble the cape, and have acquired all of the tools and knowledge I need to do it.
Overall, it's been a really great experience. Now I just need to work on building my NEXT and final cape.
I must confess first that I was losing faith in my sewing machine. I've been growing continually frustrated with its apparent limitations, and the fact that the string keeps breaking.
Turns out, like any tool, you need to know how to use in order to get good results out of it. I'm VERY fortunate to have purchased this sewing machine from a seller who is really happy, willing, and able to provide all kinds of support for his product. And quick too! I've been firing off question after question, and he belts answers right back. My biggest complaint over the last two days has been the machines seeming inability to sew through a couple layers of the cape fabric. The seller recommended a few settings to switch, and more importantly to switch to a size 18 heavy duty needle. I went down to Jo-Anne's and got one this morning.
Allz I can say is WOW! Once I put that needle on and jacked the tension all the way up to 9 (no, not to 11) I was PLOWING through multiple layers of the stuff. It was sick. Knowing that I and my machine were now working toward the same goal, it was time for the final assembly of the cape.
A tip I picked up from a website was to use binding clips to hold your fabric together. They are faster to put in and remove than pins, and less hassle too. And considering the thickness of this fabric loaf, I figured they would work great. I picked up a pack of fifty from Office Depot for like three bucks, and stacked up and positioned my material just how I wanted to sew it.

And that was really all there was to it. I had the final assembly done in just a couple of minutes. I ran my seam over it twice, just to reiforce it, and it turned out great. Here's the final piece.

And a close up of the collar.

Please disregard the color differences. Though I am happy with the outer shell and inner lining of the cape, the stabilizer and cape clips are all wrong. Just temporary.
A few thoughts as a post-mortem on the prototype cape. First of all, I'm VERY happy to have it done. I'm also very happy that I made a prototype, and did not put all my eggs in one basket for this. If I was working against a timeline and this was my final result, I would be in trouble.
Why? Overall, I'm not happy with the weight. The thing is frickin' heavy. So much so that I would need to devise some kind of rig under the costume to keep it in place, and it would probably be wildly uncomfortable to wear after an hour or so. I have two things I can do to remediate this. First of all, I'm working on the opacity of my latex. Regular readers will be familiar with my struggles in this area. I think if I can get the latex down to three layers plus an adhesion layer, that will cut the weight down significantly. I think this cape has something like six or seven layers. Second, the inner lining is pretty heavy. I need to switch to a lighter weight material. Now that I am much more comfortable with the process of dying, a lot of opportunities have opened for me. All I really need to do is find a fabric that I like in white, and I can make it happen.
I also learned a lot about how to assemble the cape, and have acquired all of the tools and knowledge I need to do it.
Overall, it's been a really great experience. Now I just need to work on building my NEXT and final cape.
Cape Clip Assembly
This is the final step in building a cape, short of sewing the whole thing together. I probably documented this more than I needed to, but hey, it was fun.
I started out by making a paper pattern for the cape clips. This was sized off a tracing I did from the real deal cape. I extended one end of it so I would have some wiggle room.
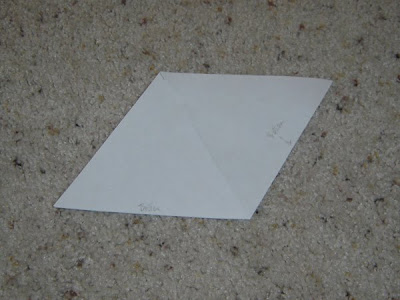
I then traced the pattern onto a scrap of cape material that I whipped up the other day. I used a fine tip sharpie to do it.

I then went to my kitchen and used a rotary cutter and a straight edge to cut the shapes out. I wish I would have used my rotary cutter when I was doing the body suit test. It's a great tool, cuts really clean, and leaves nice lines.

Here's the final pieces.

Next, I needed to cut some velcro to go on the clips. Betcha didn't know there was velcro on the clips! Just like before, I went into Adobe Illustrator and drew up a pattern using a close up shot of the real deal cape that I had scaled to the proper size. I cleaned it up a little, and then printed a couple of them out.

I used a silver sharpie (since black wouldn't work) to mark the back side of the velcro. This made it very easy to cut out.

Here are the final two velcro pieces for the cape clips.

I then took them to the sewing machine and attached them. This actually proved to be a bit of a pain, but I won't bore you with the details. Bottom line, I got it done.

The last step was to sew the cape clips closed.

So that's it for the cape clips. Only ONE task remains on the cape, and that's to sew up the neckline, and then it's done. Too bad this is just a prototype, and that I'll have to repeat the entire process at least one more time!!!
I started out by making a paper pattern for the cape clips. This was sized off a tracing I did from the real deal cape. I extended one end of it so I would have some wiggle room.

I then traced the pattern onto a scrap of cape material that I whipped up the other day. I used a fine tip sharpie to do it.

I then went to my kitchen and used a rotary cutter and a straight edge to cut the shapes out. I wish I would have used my rotary cutter when I was doing the body suit test. It's a great tool, cuts really clean, and leaves nice lines.

Here's the final pieces.

Next, I needed to cut some velcro to go on the clips. Betcha didn't know there was velcro on the clips! Just like before, I went into Adobe Illustrator and drew up a pattern using a close up shot of the real deal cape that I had scaled to the proper size. I cleaned it up a little, and then printed a couple of them out.

I used a silver sharpie (since black wouldn't work) to mark the back side of the velcro. This made it very easy to cut out.

Here are the final two velcro pieces for the cape clips.

I then took them to the sewing machine and attached them. This actually proved to be a bit of a pain, but I won't bore you with the details. Bottom line, I got it done.

The last step was to sew the cape clips closed.

So that's it for the cape clips. Only ONE task remains on the cape, and that's to sew up the neckline, and then it's done. Too bad this is just a prototype, and that I'll have to repeat the entire process at least one more time!!!
Friday, March 19, 2010
Cape Clips In Development
They're not REALLY cape clips, but they sort of are. But that is a term and an item that is very common to Batman costumers. Since mine will serve basically the same purpose and "Cape triangles" sounds a bit weird, this is the term I will use for the next phase of the cap development.
This will be the last pice I need to fabricate for my test cape, and it really shouldn't take long. Right now, I'm in the final steps of whipping up a few square inches of cape fabric that I can use to make them.

This gave me a good opportunity to check out the latex I got from MonsterClub, and see how it works. So far, it's thicker than Burman's slip casting, and does cure a tad more opaque. It's not quite where I need it to be, but it's a step closer.
My next few posts on the cape will probably give away WAAAAY too much information on the cape. Stuff that you would never figure out by looking at screen shots and promotional stills. So start grabbin' all the data you see here, as this will be some serious behind the scenes shenanigans.
This will be the last pice I need to fabricate for my test cape, and it really shouldn't take long. Right now, I'm in the final steps of whipping up a few square inches of cape fabric that I can use to make them.

This gave me a good opportunity to check out the latex I got from MonsterClub, and see how it works. So far, it's thicker than Burman's slip casting, and does cure a tad more opaque. It's not quite where I need it to be, but it's a step closer.
My next few posts on the cape will probably give away WAAAAY too much information on the cape. Stuff that you would never figure out by looking at screen shots and promotional stills. So start grabbin' all the data you see here, as this will be some serious behind the scenes shenanigans.
Subscribe to:
Posts (Atom)