Painting on the primer revealed a lot of little flaws all over the place, and today I spent some time adressing some of the more obvious ones. I really just sort of pick a spot, look for problems, then attack. The types of things I'm working on now are what I'm referring to as "spider cracks", even though they are not cracks, nor are they made by spiders.
But they SORT OF look like spider webs. I think these were just flaws introduced into the molds, maybe due to cracked paint or something. Who knows.
Here's how the front looks now. I didn't do any sanding on the primer, but instead decided to fill the obvious holes that were revealed by the light color.
There was a lumpy imperfection right down at the bottom, behind the drivers side front wheel well. Sanding it fixed most of it, but there were some recesses which have since been puttied over. I'm beginning to depend a bit more on my mouse sander for knocking down stuff like that. I really don't like using mechanized sanders on the body, mainly due to a fear that I will knock down too much too fast. This has happened to me in the past on other projects.
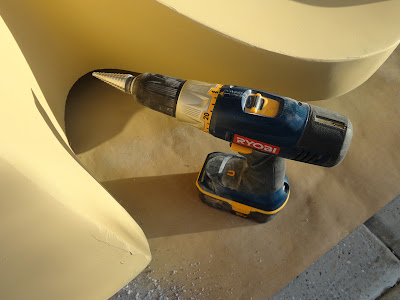
I also got started on cutting out the headlight recesses. I used this drill bit to chew out big holes, which will be used as starting points for my jig saw. This thing goes through fiberglass like magic!
Here's a general look at how things currently sit on the drivers side. You can see where I've applied some VERY thin swipes of putty in order to fill in scratches and the like.
Another imperfection I noticed after I applied the primer was attended to here. Just a slight rise in the body along the ridge.
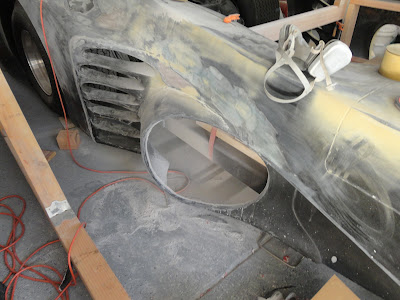
Lastly, here's my most significant accomplishment of the day. I took out the side air intake cover. I finished the job using my grinder, and then went in with a disk sander on my drill. The latter gives me more control and a more smoothness. Hard to tell in this photo, but it turned out really nicely.
Also, I'd like to take a moment to thank all of the folks who are following my blog, reading it, and even commenting on it. Your words of encouragement are really appreciated, as are your questions and comments. All are thought provoking, and many help me think of solutions that I had previously not considered. Please don't read this blog thinking I am an expert at making Batmobiles. I'm not. This is my first one, and It's ALL new to me. So if you see me doing something that looks wrong, or you know of a better way to do it, please don't hesitate to let me know!


1 comment:
Hey Matt, I know this is the point in the build where you can't show off too much progress, as the body needs a lot of care taken, but it certainly looks great thus far, and I'm looking forward to more posts :) Thanks for all the videos and postings. James, Ontario
Post a Comment