Since this type of suit has already been documented pretty heavily online, I won't really go into photographic detail too much. But it is pretty fantastic.
Showing posts with label Batman: The Dark Knight. Show all posts
Tuesday, December 25, 2012
Dark Knight Costume from UD Replicas
This is my second purchase from UD Replicas, and I'm just as happy with this suit as I was with my DareDevil suit. Great work, as always David!
Saturday, December 18, 2010
Batarangs! Tiny Ones!
A recent addition to my prop collection are these really nice mini-batarangs as seen in Batman Beings. These were hand sculpted by a talented enthusiast, and made available by the same chap who sold me the cape that went with my halloween costume.

Based on the screen captures I have seen, these are much more accurate than the DC Direct set that is commercially available.

Based on the screen captures I have seen, these are much more accurate than the DC Direct set that is commercially available.
Thursday, November 4, 2010
Halloween Night!
Of all the halloween’s I’ve attended in my entire life, the one of 2010 EASILY goes down in the record books as the best one ever. EVER. No, really. It was amazing. This post will be sort of long winded, as there’s a few things about the costume that I want to document for future reference, along with a bit of a “highlight reel” from the day itself.

As readers will know, I have been working hard over the past few weeks to build up a Batman costume from “The Dark Knight”. It all came together really quickly, and turned out really well. But I did cut a lot of corners, and it certainly does not measure up to the normal standards of Matt Munson perfection. But the real lesson I learned this past weekend was that it just doesn’t matter. In this blog I have theorized numerous times that 99% of the population would not notice the little errors in my costume that bothered me. Turns out, I was more right than I knew.
But I digress. Let me take a step back to set the scene.
I finished the suit a few days prior to Halloween, and packed it all up into a suitcase that I had purchased specifically for this event. I packed the cowl in bubble wrap and put that in my backpack, and then headed off to New York. My plan was to attend the Halloween bash in the villiage. I arrived at LaGuardia on Saturday afternoon, to beautifully clear skies, though with a bit of a chill to the air.

I was spending the weekend with a friend in Brooklyn, who was kind enough to host. We spent Saturday night at a local house party, where my costume consisted of street clothes and my dark knight cowl. In retrospect, I totally should have suited up for the event, but it all worked out in the end. What surprised me here were the reactions I was getting to JUST the cowl. People were freaking out at how good it looked! They were used to the off the shelf stuff that is readily available at Party City type places a few days before Halloween. I guess they were just not ready for someone who actually spent time on their costume.
Sunday started pretty late, and I started prepping to get the full suit up done in the late afternoon. Before the sun had set, we were all dressed and ready to head out to one of those “Safe” Halloween neighborhood block parties a couple miles away. The idea was that Tom’s daughters would do their Halloween business here, and after that, he and I would head off to “the City”.
I thought long and hard about what to do about the neck. Before I left for New York, I had contemplated re-doing the neck part, as it was VERY uncomfortable. It was very tight, and rather constricting. It also kind of pushed my chin up a bunch. It made turning my head a tad difficult too. Overall, just a bad fit. On Sunday, I decided I was going to strip off the armor and the mesh fabric, leaving behind only the black milliskin hood that I had sewn up. This was a really tough decision for me, as it would mean sacrificing a great deal of accuracy. I reassured myself again and again by saying “nobody is going to stop me on the street and say ‘Great suit! BUT, I couldn’t help but notice that your neck armor is missing’”. I mean, come on. Knowing that I would be in this thing all night, comfort was going to have to be king. So I peeled off the armor, and spent about an hour with the X-Acto knife stripping the threads out so I could remove the mesh.
Once I got fully suited up, I noticed a few things about the costume. Keep in mind, this was the FIRST time I had done a full suit up. First of all, the backs of my knees were chafing. I don’t even know what they were chafing on, but it felt like there was a pine cone in my suit. Same thing with the lower back. This was from where I had sewn the darts into it. They were digging into me. In all of the test fittings I had done, I was wearing a t-shirt under the mesh, preventing the fabric from irritating me. Now that it was just the body suit, it was a different story. The cowl fit great. In fact, it was the most comfortable part of the costume. The only time my vision was blocked was when I tried to look down, like at my belt. Other than that, my vision was entirely unencumbered. Overall, the stuit fit amazingly well. All of the little tweaks I had made totally panned out. Particularly the gauntlets.

The removable cod piece and zippered mesh suit was amazing. Had the armor not made me so inflexible, I would have been patting myself on the back all night long for that one. Even with my superman costume, going to the bathroom is a real process. In previous batman suits, I LITERALLY had to take the entire thing off in order to go. This suit provide only about twice as much work as my normal street clothes. It was quite cool.
Before the sun set, I was already being mobbed by kids who wanted photos.

I even got to be in the parade, which was where I got my first taste of super stardom. The camera flashes were almost blinding! All those people calling my name! Well, not MY name. But you get the idea.
Then it was time to head into town. We took the subway, of course.

Though a couple of people were staring, the rest were just acting like it was business as usual.

Once we got down to the village, it was just insanity. I actually didn't get many photos this year, which is something I will need to pay closer attention to next year. Here's me with Two-Face and Kick-Ass.

And yes, even Batman has to txt!

This may sound odd, but without doubt, the coolest part of the costume was the cape. Which is interesting because it is the cape that really motivated me to begin this project initially. An online friend acquired some behind the scenes intel on how to make a super accurate cape, and I purchased one thinking that MAYBE some day I would actually get around to building the full suit. When the cape arrived, I knew I had to do it for Halloween. The cape is so amazing. It’s got so much fabric in it, and it’s so light. The great news about Halloween this year is that occasionally a wind would kick up and the cape would just dance. I was in some photos where there was a wind coming from my side, or behind, and the cape just swarmed up around me. Really amazing look. People were literally ooh-ing and aah-ing when the cape lit up like that. It was spectacular!

After all was said and done, I headed home the next day.

There were a few failure points for the suit, which I will document here if only so I can keep track of them for next year. I lost a set of fins on one of the gauntlets. Because they were too big for the channel that was cut into the gauntlet, I ended up splitting the fins up in to three separate pieces, one piece for each set of fins. I either snagged one of the fins on something, or the glue just didn’t hold well enough. But I lost one of those. The Velcro on the seams of one of the gauntlets also gave out. I was actually planning on re-doing that anyway, so this isn’t really a big deal. The Velcro I had glued onto the forearms of the body suit also completely came off. I will need to repair that. The left boot dug a nice hole into my heel, which is still pretty raw as I write this. I knew pretty quickly in the evening that this was going to be a problem, but I guess I just worked through it. I don’t know if this means I need to break the boots in a little more, or if there’s something I can put in the boot to prevent trouble in the future.
The gloves also saw a little separation around the wrist. Not sure why. Maybe I was just opening and closing them too much. I may want to replace those. I need to do something about the backs of the knees and the lower back. Maybe I will sew a cotton panel into the undersuit to prevent the mesh from digging into me at those points.
Overall, the armor stayed attached incredibly well. I’m stunned at how well it held together. Some of the pieces right around the front got bent and are showing some creases. Probably from where I sat down. There are also some scuffs on the armor, but I can probably fix that with a little plasti-dip. I suppose I need to decide if the plan is to keep this costume pristine, or if it’s to make it a wearable suit. I am leaning towards the latter. I was smart enough to pack with me a little bottle of Dap, which I used right before I headed out to re-stick one of the leg pieces which was lifting up.

As readers will know, I have been working hard over the past few weeks to build up a Batman costume from “The Dark Knight”. It all came together really quickly, and turned out really well. But I did cut a lot of corners, and it certainly does not measure up to the normal standards of Matt Munson perfection. But the real lesson I learned this past weekend was that it just doesn’t matter. In this blog I have theorized numerous times that 99% of the population would not notice the little errors in my costume that bothered me. Turns out, I was more right than I knew.
But I digress. Let me take a step back to set the scene.
I finished the suit a few days prior to Halloween, and packed it all up into a suitcase that I had purchased specifically for this event. I packed the cowl in bubble wrap and put that in my backpack, and then headed off to New York. My plan was to attend the Halloween bash in the villiage. I arrived at LaGuardia on Saturday afternoon, to beautifully clear skies, though with a bit of a chill to the air.

I was spending the weekend with a friend in Brooklyn, who was kind enough to host. We spent Saturday night at a local house party, where my costume consisted of street clothes and my dark knight cowl. In retrospect, I totally should have suited up for the event, but it all worked out in the end. What surprised me here were the reactions I was getting to JUST the cowl. People were freaking out at how good it looked! They were used to the off the shelf stuff that is readily available at Party City type places a few days before Halloween. I guess they were just not ready for someone who actually spent time on their costume.
Sunday started pretty late, and I started prepping to get the full suit up done in the late afternoon. Before the sun had set, we were all dressed and ready to head out to one of those “Safe” Halloween neighborhood block parties a couple miles away. The idea was that Tom’s daughters would do their Halloween business here, and after that, he and I would head off to “the City”.
I thought long and hard about what to do about the neck. Before I left for New York, I had contemplated re-doing the neck part, as it was VERY uncomfortable. It was very tight, and rather constricting. It also kind of pushed my chin up a bunch. It made turning my head a tad difficult too. Overall, just a bad fit. On Sunday, I decided I was going to strip off the armor and the mesh fabric, leaving behind only the black milliskin hood that I had sewn up. This was a really tough decision for me, as it would mean sacrificing a great deal of accuracy. I reassured myself again and again by saying “nobody is going to stop me on the street and say ‘Great suit! BUT, I couldn’t help but notice that your neck armor is missing’”. I mean, come on. Knowing that I would be in this thing all night, comfort was going to have to be king. So I peeled off the armor, and spent about an hour with the X-Acto knife stripping the threads out so I could remove the mesh.
Once I got fully suited up, I noticed a few things about the costume. Keep in mind, this was the FIRST time I had done a full suit up. First of all, the backs of my knees were chafing. I don’t even know what they were chafing on, but it felt like there was a pine cone in my suit. Same thing with the lower back. This was from where I had sewn the darts into it. They were digging into me. In all of the test fittings I had done, I was wearing a t-shirt under the mesh, preventing the fabric from irritating me. Now that it was just the body suit, it was a different story. The cowl fit great. In fact, it was the most comfortable part of the costume. The only time my vision was blocked was when I tried to look down, like at my belt. Other than that, my vision was entirely unencumbered. Overall, the stuit fit amazingly well. All of the little tweaks I had made totally panned out. Particularly the gauntlets.

The removable cod piece and zippered mesh suit was amazing. Had the armor not made me so inflexible, I would have been patting myself on the back all night long for that one. Even with my superman costume, going to the bathroom is a real process. In previous batman suits, I LITERALLY had to take the entire thing off in order to go. This suit provide only about twice as much work as my normal street clothes. It was quite cool.
Before the sun set, I was already being mobbed by kids who wanted photos.

I even got to be in the parade, which was where I got my first taste of super stardom. The camera flashes were almost blinding! All those people calling my name! Well, not MY name. But you get the idea.
Then it was time to head into town. We took the subway, of course.

Though a couple of people were staring, the rest were just acting like it was business as usual.

Once we got down to the village, it was just insanity. I actually didn't get many photos this year, which is something I will need to pay closer attention to next year. Here's me with Two-Face and Kick-Ass.

And yes, even Batman has to txt!

This may sound odd, but without doubt, the coolest part of the costume was the cape. Which is interesting because it is the cape that really motivated me to begin this project initially. An online friend acquired some behind the scenes intel on how to make a super accurate cape, and I purchased one thinking that MAYBE some day I would actually get around to building the full suit. When the cape arrived, I knew I had to do it for Halloween. The cape is so amazing. It’s got so much fabric in it, and it’s so light. The great news about Halloween this year is that occasionally a wind would kick up and the cape would just dance. I was in some photos where there was a wind coming from my side, or behind, and the cape just swarmed up around me. Really amazing look. People were literally ooh-ing and aah-ing when the cape lit up like that. It was spectacular!

After all was said and done, I headed home the next day.

There were a few failure points for the suit, which I will document here if only so I can keep track of them for next year. I lost a set of fins on one of the gauntlets. Because they were too big for the channel that was cut into the gauntlet, I ended up splitting the fins up in to three separate pieces, one piece for each set of fins. I either snagged one of the fins on something, or the glue just didn’t hold well enough. But I lost one of those. The Velcro on the seams of one of the gauntlets also gave out. I was actually planning on re-doing that anyway, so this isn’t really a big deal. The Velcro I had glued onto the forearms of the body suit also completely came off. I will need to repair that. The left boot dug a nice hole into my heel, which is still pretty raw as I write this. I knew pretty quickly in the evening that this was going to be a problem, but I guess I just worked through it. I don’t know if this means I need to break the boots in a little more, or if there’s something I can put in the boot to prevent trouble in the future.
The gloves also saw a little separation around the wrist. Not sure why. Maybe I was just opening and closing them too much. I may want to replace those. I need to do something about the backs of the knees and the lower back. Maybe I will sew a cotton panel into the undersuit to prevent the mesh from digging into me at those points.
Overall, the armor stayed attached incredibly well. I’m stunned at how well it held together. Some of the pieces right around the front got bent and are showing some creases. Probably from where I sat down. There are also some scuffs on the armor, but I can probably fix that with a little plasti-dip. I suppose I need to decide if the plan is to keep this costume pristine, or if it’s to make it a wearable suit. I am leaning towards the latter. I was smart enough to pack with me a little bottle of Dap, which I used right before I headed out to re-stick one of the leg pieces which was lifting up.
Thursday, October 21, 2010
Cowl Clean Up, Purchases.
Things are definitely slowing down as I run out of things to do. By my estimates, the only manditory remaining task is attaching the neck armor. I am very seriously contemplating hemming up the cape.
I picked up a can of black Plasti-Dip the other day at Lowe's. I've never used it before, so there were a few unknowns. But after a few tests, I really grew to like the stuff. What I find most interesting is that you can apply it over an existing coat, and it blends in really well. It flattens out nicely.

And with that knowledge in mind, I did a bit of touch up spraying on the cowl. It probably didn't even need it, nobody would have noticed, but there were a couple parts that did not recieve good coverage in the initial painting, so I nailed those. You cannot really tell from the pictures, but it turned out great. I also painted over the fabric that I glued onto the inside of the chin strap to make sure it is well hidden.

I mentioned earlier that I wanted a new camera for Halloween. Today I got one from costco. I am a huge fan of Sony products. In fact, I still use a Sony camera I purchased about six years ago for most of my photography. It's not the best in low light, and it's pretty big compared to todays cameras, but MAN does it get the job done. I stuck with Sony and picked up this nice little tiny cybershot.

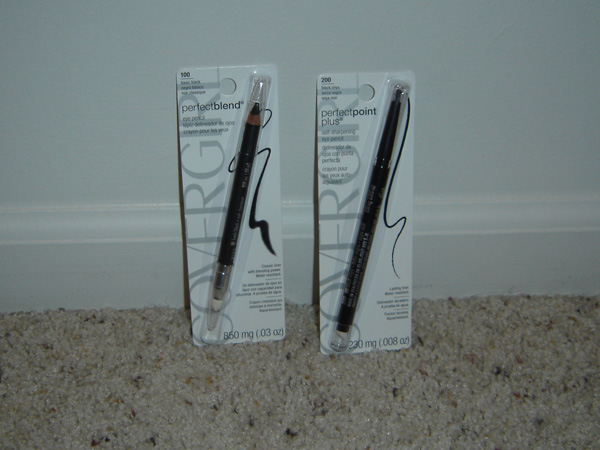
Lastly, I picked up some eye liner! Historically, this has proven really effective for blacking out my eyes when wearing a Batman costume. It's pretty tenacious stuff, and stands up really well. I picked up a couple different kinds, in case one works better than another.

Since I have found out how well the plasti-dip blends with prior applications, I'm going to fix a flaw I caused on the leg armor. I got some Dap on the front side of one piece, and it ate right through the plasti-dip. I will fix that.
I'm going to take a closer look at the cape right now, to see if I think I can pull off a respectable hem fix.
I picked up a can of black Plasti-Dip the other day at Lowe's. I've never used it before, so there were a few unknowns. But after a few tests, I really grew to like the stuff. What I find most interesting is that you can apply it over an existing coat, and it blends in really well. It flattens out nicely.

And with that knowledge in mind, I did a bit of touch up spraying on the cowl. It probably didn't even need it, nobody would have noticed, but there were a couple parts that did not recieve good coverage in the initial painting, so I nailed those. You cannot really tell from the pictures, but it turned out great. I also painted over the fabric that I glued onto the inside of the chin strap to make sure it is well hidden.

I mentioned earlier that I wanted a new camera for Halloween. Today I got one from costco. I am a huge fan of Sony products. In fact, I still use a Sony camera I purchased about six years ago for most of my photography. It's not the best in low light, and it's pretty big compared to todays cameras, but MAN does it get the job done. I stuck with Sony and picked up this nice little tiny cybershot.

Lastly, I picked up some eye liner! Historically, this has proven really effective for blacking out my eyes when wearing a Batman costume. It's pretty tenacious stuff, and stands up really well. I picked up a couple different kinds, in case one works better than another.

Since I have found out how well the plasti-dip blends with prior applications, I'm going to fix a flaw I caused on the leg armor. I got some Dap on the front side of one piece, and it ate right through the plasti-dip. I will fix that.
I'm going to take a closer look at the cape right now, to see if I think I can pull off a respectable hem fix.
Wednesday, October 20, 2010
Neck, Sleeves, Pouches
Today saw me knock another bunch of little todo items off the list. Sort of tiny tasks, but all of varying degrees of importance. I really like solving mechanical problems in interesting and durable ways, so this phase of the project is really fun for me. It's more about coming up with unique solutions to unusual problems, as opposed to just following directions.
I flipped the cowl inside out so that I could dremel away some excess material around the eyes. They were kind of digging into the area around my eyes, so they needed a little smoothing out. I also tightened up the chin strap. It seems to be holding together pretty well. I cut it with scissors, then removed a little material. I used Dap to glue the two parts together, then soaked a little strip of material in dap and glued that in on the inside. Then I sprayed the inside of the chin strap with plasti-dip to hide it.

I added a big slab of velcro to each of the sleeves. This will hold the gauntlets securely in place, and stop them from spinning around on my forearms. Not like they were going to be whipping around, but they could slowly slip as the evening progresses. This should keep them VERY firmly in place. They are held in place by Dap, which is my new favorite product evar.

I also FINALLY finished the hood. I built a piece out of the mesh material using the same pattern as the milliskin hood. I was a little worried that it would be too small, but it fits AMAZINGLY. It also hides ALL of the imperfections that I was so worried about in the milliskin hood. Lesson learned, silly boy. Notice that the entire head is not covered by the mesh, just the neck. I didn't want the cowl to fit my head any tighter than it already does, as it's pretty much the perfect fit right now.

The bottom line is that the neck turned out rediculously good. though there is ONE major flaw in it. I pinned part of it wrong, and consequently, one of the seams is on the outside. I was going to fix it, but then figured because the neck armor will be covering it, I just don't care. Nobody will ever see it. I MAY re-make the entire hood after halloween, as I learned so much from making this first one. Namely that the under-hood doesn't need to look very good at all, as you're not going to see it at all. I was getting very worried about making it fit perfectly, and not getting any ripples or gathering in the fabric. Turns out, you can't even see it. Doesn't matter.
Here is a picture of my KB V 2.0 belt that arrived in the mail the other day. It's just stunningly beautiful. Rediculous. The guy who did the build up is just an artist. No doubt about it. I NEVER could have done the kit the justice that this man did. I am DEFINITELY not going to wear this on halloween, as it's just too pretty. This belongs in a display case, not around my waist.
For better pics of the belt, check out this blog post.

Another item on my todo list was to make sure my camera pouches fit on my belt. Well, they do! I sort of wish the Sony one would fit around the wider part so that I could put it in the back, but that's a minor detail. Besides, it IS a utility belt.

Only a few tiny items remaining on my todo list. I need to get some eye makeup, I would like to buy a new camera for the event (since both of my current cameras have not been serving me well lately) and I need to attach the neck armor. Other than that, I am done. I will do one final suit up to make sure all the parts fit together properly, but that's it.
I am DEEP in internal debate about the cape. It drags on the floor. As does the screen used movie cape. But I'm not sure if I want that for halloween. It looks great though. But I know it will get dirty, and maybe a little trashed. I think if I hem it up, I run the risk of doing it wrong. If I wear it out and it gets damaged, I can always hem it up AFTERWARDS and hide the damage. I'm just worried that I will do it wrong and ruin the cape. It's just so beautiful, and I love the fact that it's screen accurate at that length. I will have to think more about it.
That's all for now. As always, thanks for reading, and thanks for all the supportive emails and comments. I appreciate it!
I flipped the cowl inside out so that I could dremel away some excess material around the eyes. They were kind of digging into the area around my eyes, so they needed a little smoothing out. I also tightened up the chin strap. It seems to be holding together pretty well. I cut it with scissors, then removed a little material. I used Dap to glue the two parts together, then soaked a little strip of material in dap and glued that in on the inside. Then I sprayed the inside of the chin strap with plasti-dip to hide it.

I added a big slab of velcro to each of the sleeves. This will hold the gauntlets securely in place, and stop them from spinning around on my forearms. Not like they were going to be whipping around, but they could slowly slip as the evening progresses. This should keep them VERY firmly in place. They are held in place by Dap, which is my new favorite product evar.

I also FINALLY finished the hood. I built a piece out of the mesh material using the same pattern as the milliskin hood. I was a little worried that it would be too small, but it fits AMAZINGLY. It also hides ALL of the imperfections that I was so worried about in the milliskin hood. Lesson learned, silly boy. Notice that the entire head is not covered by the mesh, just the neck. I didn't want the cowl to fit my head any tighter than it already does, as it's pretty much the perfect fit right now.

The bottom line is that the neck turned out rediculously good. though there is ONE major flaw in it. I pinned part of it wrong, and consequently, one of the seams is on the outside. I was going to fix it, but then figured because the neck armor will be covering it, I just don't care. Nobody will ever see it. I MAY re-make the entire hood after halloween, as I learned so much from making this first one. Namely that the under-hood doesn't need to look very good at all, as you're not going to see it at all. I was getting very worried about making it fit perfectly, and not getting any ripples or gathering in the fabric. Turns out, you can't even see it. Doesn't matter.
Here is a picture of my KB V 2.0 belt that arrived in the mail the other day. It's just stunningly beautiful. Rediculous. The guy who did the build up is just an artist. No doubt about it. I NEVER could have done the kit the justice that this man did. I am DEFINITELY not going to wear this on halloween, as it's just too pretty. This belongs in a display case, not around my waist.
For better pics of the belt, check out this blog post.

Another item on my todo list was to make sure my camera pouches fit on my belt. Well, they do! I sort of wish the Sony one would fit around the wider part so that I could put it in the back, but that's a minor detail. Besides, it IS a utility belt.

Only a few tiny items remaining on my todo list. I need to get some eye makeup, I would like to buy a new camera for the event (since both of my current cameras have not been serving me well lately) and I need to attach the neck armor. Other than that, I am done. I will do one final suit up to make sure all the parts fit together properly, but that's it.
I am DEEP in internal debate about the cape. It drags on the floor. As does the screen used movie cape. But I'm not sure if I want that for halloween. It looks great though. But I know it will get dirty, and maybe a little trashed. I think if I hem it up, I run the risk of doing it wrong. If I wear it out and it gets damaged, I can always hem it up AFTERWARDS and hide the damage. I'm just worried that I will do it wrong and ruin the cape. It's just so beautiful, and I love the fact that it's screen accurate at that length. I will have to think more about it.
That's all for now. As always, thanks for reading, and thanks for all the supportive emails and comments. I appreciate it!
Tuesday, October 19, 2010
TDK: Random Tasks Cont'd
As I reach the tail end of the build, it's really coming together, and the remaining tasks are becoming more and more esoteric. My todo list is getting shorter, but there are still a couple doozies on there. The main one is the hood and cowl. I've decided to dedicate tomorrow evening on that. I want to be fresh when I tackle that, as it is some pretty important stuff.
But that doesn't mean I didn't get a lot of great stuff done tonight.
I finished off the wrists and thumb holes on the black undersuit.

And also did the heels. The seam is a little sloppy, but who cares.

I also trimmed up the gauntlets so they fit better around my forearm, and also decided to do some velcro on the back side to help keep them in place. I have placed strips of the soft side inside the gauntlets. The burr side of the velcro will go on the mesh outer suit.

Not pictured, but I also went over the mesh outer suit with a sharpie and touched up any places where glue was showing. Just tiny little white spots that would otherwise stand out against the armor and mesh.
Last night I got all bent out of shape over the fact that I was going to have to re-do the cod strap, as it was burr side out. I was worried that could scuff up the cape. Then I realized, all I need to do is cut a rectangle of furry side of the velcro, and stick it to it. DONE!

The most fun of the night came from attaching the cape to the chest armor. I put some thought into it, and finally came up with a really simple solution. It starts with some leftover shoe string that I originally got for the cod strap. I threaded that through the eyelets in the cape, and then sewed the loop off.

I then made some straps of velcro. These are about 1" wide. Furry size and burr side facing up, joined at one end.

Here's the cape threaded through the holes in the armor. It's actually really clever.

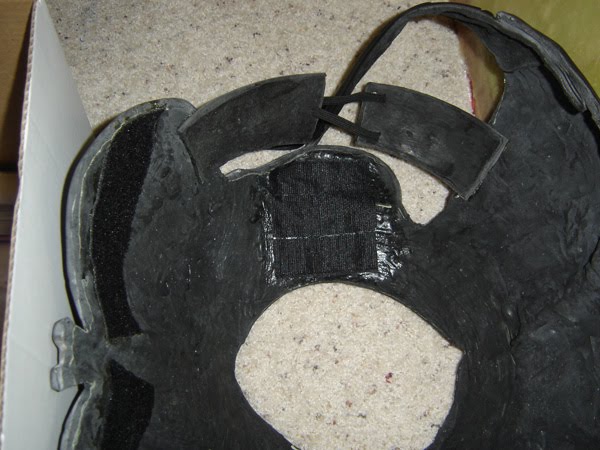
And lastly, here's a shot of the inside of the chest, showing how the whole thing goes together.

I like this solution because it allows me to remove the cape for packing and travel, but it's also very quick to put the cape back on. The velcro straps make it adjustable in case I need to increase or remove tension. Overall, a total cape win!
But that doesn't mean I didn't get a lot of great stuff done tonight.
I finished off the wrists and thumb holes on the black undersuit.

And also did the heels. The seam is a little sloppy, but who cares.

I also trimmed up the gauntlets so they fit better around my forearm, and also decided to do some velcro on the back side to help keep them in place. I have placed strips of the soft side inside the gauntlets. The burr side of the velcro will go on the mesh outer suit.

Not pictured, but I also went over the mesh outer suit with a sharpie and touched up any places where glue was showing. Just tiny little white spots that would otherwise stand out against the armor and mesh.
Last night I got all bent out of shape over the fact that I was going to have to re-do the cod strap, as it was burr side out. I was worried that could scuff up the cape. Then I realized, all I need to do is cut a rectangle of furry side of the velcro, and stick it to it. DONE!

The most fun of the night came from attaching the cape to the chest armor. I put some thought into it, and finally came up with a really simple solution. It starts with some leftover shoe string that I originally got for the cod strap. I threaded that through the eyelets in the cape, and then sewed the loop off.

I then made some straps of velcro. These are about 1" wide. Furry size and burr side facing up, joined at one end.

Here's the cape threaded through the holes in the armor. It's actually really clever.

And lastly, here's a shot of the inside of the chest, showing how the whole thing goes together.

I like this solution because it allows me to remove the cape for packing and travel, but it's also very quick to put the cape back on. The velcro straps make it adjustable in case I need to increase or remove tension. Overall, a total cape win!
Final Body Suit Chores
As far as I can tell for right now, the mesh body suit and armor is complete. It's a little messy in some places, and there are a few TINY things that I might go back and fix, but as of right now, I think it is done.
Here's the last few little clean up chores I did tonight to get it to this point.
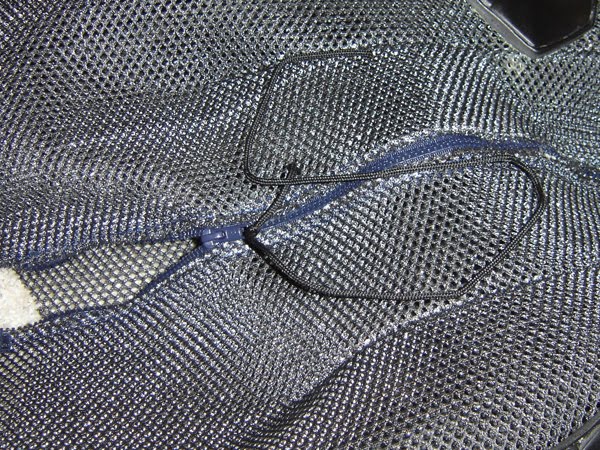
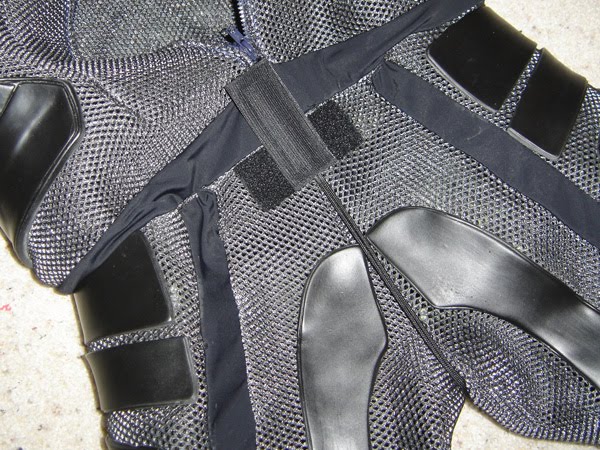
I put a length of shoe lace on the zipper pull going up the spine. This will allow me to get in and out of the suit more easily. The bulk of the pull is easy, but the last foot is a real pain in the back. This isn't really a big spectacular piece of work, but is really just a little enhancement to make life easier.

I also added a zipper onto one of the wrists. The right arm fit a little more snug than the left, and it was a bit more difficult to get in and out of. This will just make the suit-up process that much easier.

Lastly, I built a little velcro attachment for the cod string. AND I just realized I made a mistake. I used the burr part of the velcro on the string. This is bad, as this will be touching the cape, and could do some damage to it. Maybe. Or it could cling to it. I might have to put some cloth on one side of it. I originally wanted to have burr on both sides of the tab, with the thought being that this would mean less fiddling around if I had to undo or attach the thing mid-bathroom break. But now that I think about how it could brush up against the cape, its not worth it. I will need to revisit this.

I wrote a to-do list tonight of the remaining tasks, and it is really not that long. I think if I put my mind to it, I could finish it all up in one evening. In fact, THAT shall be my plan. I will try to get the entire costume finished by tomorrow night. That could be a little agressive, but I'd rather get it done two days early and have to stay up a bit late, than to have to work up until the last minute. This will also give me two days to ponder anything I may have missed, or think of any enhancements I might want to make in order to improve comfort. Or something else.
As of this writing, I am REALLY pleased with the overall results. I did a partial suit-up tonight, and it looks really good. The armor makes my torso look VERY boxy, kind of like a Mike Mignola drawing, but the exaggerated shoulder bells throw off the proportions. I think at the end of the day, it will look pretty great. There are certainly some shortcomings, and things I am not 100% happy with. But I still think this will be an absolute show stopper of a Halloween costume. And that's all that counts.
Here's the last few little clean up chores I did tonight to get it to this point.
I put a length of shoe lace on the zipper pull going up the spine. This will allow me to get in and out of the suit more easily. The bulk of the pull is easy, but the last foot is a real pain in the back. This isn't really a big spectacular piece of work, but is really just a little enhancement to make life easier.

I also added a zipper onto one of the wrists. The right arm fit a little more snug than the left, and it was a bit more difficult to get in and out of. This will just make the suit-up process that much easier.

Lastly, I built a little velcro attachment for the cod string. AND I just realized I made a mistake. I used the burr part of the velcro on the string. This is bad, as this will be touching the cape, and could do some damage to it. Maybe. Or it could cling to it. I might have to put some cloth on one side of it. I originally wanted to have burr on both sides of the tab, with the thought being that this would mean less fiddling around if I had to undo or attach the thing mid-bathroom break. But now that I think about how it could brush up against the cape, its not worth it. I will need to revisit this.

I wrote a to-do list tonight of the remaining tasks, and it is really not that long. I think if I put my mind to it, I could finish it all up in one evening. In fact, THAT shall be my plan. I will try to get the entire costume finished by tomorrow night. That could be a little agressive, but I'd rather get it done two days early and have to stay up a bit late, than to have to work up until the last minute. This will also give me two days to ponder anything I may have missed, or think of any enhancements I might want to make in order to improve comfort. Or something else.
As of this writing, I am REALLY pleased with the overall results. I did a partial suit-up tonight, and it looks really good. The armor makes my torso look VERY boxy, kind of like a Mike Mignola drawing, but the exaggerated shoulder bells throw off the proportions. I think at the end of the day, it will look pretty great. There are certainly some shortcomings, and things I am not 100% happy with. But I still think this will be an absolute show stopper of a Halloween costume. And that's all that counts.
Armor, Gauntlets, Suitcase
A VERY busy night over here at the project workbench, and I'm pleased to say that I got an awful lot accomplished for a school night. With the time crunch officially on, I'm very proud to say that I think I'm actually ahead of schedule. As a lifelong procrastinator, this is a great relief to me. I actually HATE being in a mad panic, so it's very nice to see things coming together so soon. The light of the tunnel is upon me.
First up, I had to pick up a suitcase yesterday. I was going to buy a fully rigid suitcase, but then thought better of it when I saw the price tag. The idea here is that I need something that I can use to transport the suit, without it being crushed. I have a couple of suitcases, but they are all of the sport/duffel bag style. No rigid walls. I got this at Target for like 100 bucks.

As of tonight, all of the armor has been glued onto the body suit. I am missing 8 pieces from the back side, and I don't plan on adding those in. They will never be seen, and they will only serve to hinder movement further.

I needed a way to secure the cod piece under the crotch, and based on some pictures I saw online, I figured some good old fashioned shoe strings would do the trick. I'm sure some thin cord would have worked as well, but I don't know where to find that stuff. Shoe string, I know where to find.

Here you can sort of see how I attached the shoe string to the back of the cod. I basically spun the string into a little pattern, with the theory being that it is less likely to just slip out from under the cod if it's wound up like that. I first glued the string to the cod, then glued a piece of fabric down on top of that to keep it in place. That Dap stuff is REALLY strong! I love it!

And then it was on to the gauntlets. I picked up a small bottle of liquid Dap today from Lowe's. The gel stuff is a little too thick for delicate work, and I didn't want to risk getting too much goo into the channels on the gauntlets for the fins.

Here is what the gauntlets look like prior to having the fins added.

Knowing how error prone this type of work can be, I taped up the gauntlets to protect them against spilled glue. The stuff eats right through the plasti-dip, and ruins the finish. I've already seen it in action a couple of times.

No surprise, I actualy did drip a TON of glue ALL OVER the gauntlet on my first try. The inside of the cap was wet with glue, and I didn't notice it. So when I went to brush the glue in using the brush that is on the inside of the cap, I didn't notice the stuff dripping onto the gauntlet. FORTUNATELY, I had laid down that painters tape to protect it. If I had not, the finish would have been ruined. Funny, as I had ALMOST not taped it up, thinking it was too much hassle, and that I would just be careful. No such luck!
Here's the first gauntlet finished.

And here is the completed pair.

There is still a little work needed to be done on the fins, which I may end up blowing off, but for the most part, these are done. I may also need to trim the velcro so that the fit better. I guess they are not really done. There is still some work to do after all.
First up, I had to pick up a suitcase yesterday. I was going to buy a fully rigid suitcase, but then thought better of it when I saw the price tag. The idea here is that I need something that I can use to transport the suit, without it being crushed. I have a couple of suitcases, but they are all of the sport/duffel bag style. No rigid walls. I got this at Target for like 100 bucks.

As of tonight, all of the armor has been glued onto the body suit. I am missing 8 pieces from the back side, and I don't plan on adding those in. They will never be seen, and they will only serve to hinder movement further.

I needed a way to secure the cod piece under the crotch, and based on some pictures I saw online, I figured some good old fashioned shoe strings would do the trick. I'm sure some thin cord would have worked as well, but I don't know where to find that stuff. Shoe string, I know where to find.

Here you can sort of see how I attached the shoe string to the back of the cod. I basically spun the string into a little pattern, with the theory being that it is less likely to just slip out from under the cod if it's wound up like that. I first glued the string to the cod, then glued a piece of fabric down on top of that to keep it in place. That Dap stuff is REALLY strong! I love it!

And then it was on to the gauntlets. I picked up a small bottle of liquid Dap today from Lowe's. The gel stuff is a little too thick for delicate work, and I didn't want to risk getting too much goo into the channels on the gauntlets for the fins.

Here is what the gauntlets look like prior to having the fins added.

Knowing how error prone this type of work can be, I taped up the gauntlets to protect them against spilled glue. The stuff eats right through the plasti-dip, and ruins the finish. I've already seen it in action a couple of times.

No surprise, I actualy did drip a TON of glue ALL OVER the gauntlet on my first try. The inside of the cap was wet with glue, and I didn't notice it. So when I went to brush the glue in using the brush that is on the inside of the cap, I didn't notice the stuff dripping onto the gauntlet. FORTUNATELY, I had laid down that painters tape to protect it. If I had not, the finish would have been ruined. Funny, as I had ALMOST not taped it up, thinking it was too much hassle, and that I would just be careful. No such luck!
Here's the first gauntlet finished.

And here is the completed pair.

There is still a little work needed to be done on the fins, which I may end up blowing off, but for the most part, these are done. I may also need to trim the velcro so that the fit better. I guess they are not really done. There is still some work to do after all.
Monday, October 18, 2010
Leg Armor Progress
As of yesterday, the leg armor attachment is almost done. Just a few more pieces to go.

Being in a rush and allowing for a certain degree of sloppiness is very liberating! I highly encourage it from time to time. It turns out that you can actually get a lot of stuff done if you're NOT trying to be perfect!
Only a few more days left on this build. As I write this, it is Monday morning. I need for this to be done by Thursday night.

Being in a rush and allowing for a certain degree of sloppiness is very liberating! I highly encourage it from time to time. It turns out that you can actually get a lot of stuff done if you're NOT trying to be perfect!
Only a few more days left on this build. As I write this, it is Monday morning. I need for this to be done by Thursday night.
Saturday, October 16, 2010
More Glue Action
I am knee deep in the glue up. The first thing I did was to lay out all the parts, using a reference diagram I found online from Brad's original cad file.

I have started attaching a couple pieces, but no pics yet. In the mean time, here is a pic of the shoulder bells attached to the upper torso.

That's all I've got for now.


I have started attaching a couple pieces, but no pics yet. In the mean time, here is a pic of the shoulder bells attached to the upper torso.

That's all I've got for now.
Body Armor Glue-Up Begins
Mostly pics today, as I'm too tired to write. I have started the glue up process. Attaching armor plates to the body suit. Hard work!
Here's the glue I am using

First I attached some velcro to the inside of the upper torso.

That velcro matches the other side that I put onto the straps attached to the shoulder bells.

First pieces glued down are the knees and the cod. All the other pieces have to fit in between these two, so I figured it was a good place to start.

It might be the fumes, not the fatigue.
Here's the glue I am using

First I attached some velcro to the inside of the upper torso.

That velcro matches the other side that I put onto the straps attached to the shoulder bells.

First pieces glued down are the knees and the cod. All the other pieces have to fit in between these two, so I figured it was a good place to start.

It might be the fumes, not the fatigue.
Subscribe to:
Posts (Atom)