Showing posts with label Superman Returns. Show all posts

Tuesday, August 18, 2015

Superman Returns Cape Progress and Breakthrough

Much is afoot with the Superman Returns cape recently. The other day I reviewed a bunch of my old blog posts on the topic, and was reminded of a lot of things I had forgotten.

I am once again revisiting the fabric. I'm sad to say that if you snooze, you lose. This proved to be true recently in my case. A year or so ago, I found some great fabric in the fashion district which was 65" wide. I purchased enough for a couple of capes. I went back the other day to buy more, and they are all sold out. Should have gotten the whole bolt.

I still have other options. One is a VERY nicely colored heavy weight jersey knit. I currently have enough for two capes. In my older blog posts, I was lamenting the fact that I couldn't seem to get the center crease out of it. I even took it to the dry cleaner to have them press it out. I don't know why I didn't think of it then, but all it needed was a good wash in the washing machine. I did this just today with this length, and voila, the crease is gone. In this pic, the fabric is draped across my dinner table drying.

But I digress. Let's get back to the workshop and talk about the cape mold. As you will recall, I am using a latex from the Motion Picture FX company to do my cape layups.
The other night, after reading some stuff online, I decided to experiment with my spray gun, to see if the latex I am using can be sprayed, and better yet if it will stick to the mold properly. I figured this would save me a ton of time and hassle if it works.

Sure enough, my spray gun is indeed able to spray the stuff. It's not perfect, and I will probably purchase a cup gun shortly, but the idea is sound. Next step was to see how it would work on a silicone mold.

As you can see below, it worked AMAZINGLY!

The latex went on nice and thin, extremely smooth, evenly, AND it didn't pull up from the silicone at all. I was thrilled!

I put the fan on it and let it dry for a few minutes. I peeled up the corner to see how it looked. Absolutely perfect.

Here's a close up. The punchline is that it captured every tiny detail. No bubbles. Zero bubbles. It feels like it's christmas time!

Also, for reference, please note the color difference between the wet latex and how it looks after it's dry. When it's wet, it looks bright pink. When dry, it's dark red. And that is MADDENING! It's essentially impossible to mix the color of latex on sight, as it changes so drastically once it dries. This has proven to be a pain in my rear for many years now. But read on, dear reader, for there is good news ahead.

And now I had a new purpose in life. I was also out of latex, so it was time to get more. I made my way to the Motion Picture FX Company up in the valley. They have a really great store! If you're ever in the area, be sure to check them out.

While I was there, I picked up some more urethane pigments that I'm going to experiment. I'm certain you'll be able to find the results on this blog eventually.

Meanwhile, back at the shop, I started to do some experimentation with attaching fabric to the cape. Sadly, it didn't go too well, but it gave me an excuse and an opportunity to experiment with different techniques and materials.

Here you can see the two different fabrics that DIDN'T go down too well, along with a few scraps that I was using to test different spray adhesives.

After this round of tests, I have completely abandoned the spray adhesive approach. Though it could be made to work, it is highly error prone. Long story short, if you get a little drop of spray onto the cape, it ruins the latex. And it's impossible to not get drops. So that's out.

I also did another pour up of the chest emblem. I was once again experimenting with pigments, and also with a different shore hardness. This time I used PMC-770, which ultimately proved to be to soft. I definitely think PMC-780 is the right material to use on the chest emblem and the belt.

The last topic for this post is regarding pigment for the latex. You may recall from my last blog post that I was revisiting some paint I acquired while in Ohio a few years ago. Montpelier Velvet Red. I walked to Home Depot only to learn that they cannot match the paint, which meant it was off to Lowes. A super friendly dude in the paint department was able to grant my wishes, which was for not only a pint of the red, but also a pint of JUST the pigments that they use to turn the white Valspar primer into the Velvet Red. Thank you, anonymous stranger at Lowes. You are the man.

I took the paints back to the workshop and mixed up a little batch, just taking a guess at the percentages of paint to pigment to latex. I did a tiny layup in a mold and OH MY GOD the color is beautiful!!!!!! I do believe I have solved the problem of getting the color I want for the cape's outer shell, and I am extremely happy. I have to give a quick shout out to David at UD Replicas, who originally provided me with the idea of mixing latex paints directly into the latex rubber. It took a while to get it right, and a bit of ingenuity of my own, but I really think I've finally got that part locked down.

So yes, it's bean a very productive week, with a lot of great breakthroughs. The main problem I have right now is that I don't have a fool proof method for attaching a giant sheet of fabric to the back of the outer shell of the cape. I'm trying to come up with some kind of rig that will help me do it, and I have a few ideas. I think one of the next things on my plate is dying the cape fabric with the correct ombre that I'm looking for. More on that soon.

As always, thanks so much for reading! I hope you enjoy witnessing my progress as much as I do making it.

Saturday, August 15, 2015

Superman Returns Costume - Belt and Cape

As always, work on the Superman Returns costume continues, though as of late, at a brisk pace.

Recently I sat down with my trusty Dremel tool with a sanding drum attachment and cleaned up the two belts I had cast up the other week. (Also, for reference, "Casted" is not a real word. Don't use that word when talking about molding and casting things. It makes you sound like an idiot. Just saying.)

I cleaned up the flash from behind the "S" symbol, and also along the edges. These turned out great.

On the screen used belts, there would be a little segment of fabric behind the buckle, and behind that a piece of velcro. The fabric is the same stuff that the briefs were made of. Yay costume trivia!

I am once again back on the experimentation train with the cape. I keep coming up with new ideas that I want to try, based on old ideas that I had previously messed around with. The other thing on my mind right now is the ultimate fragility of the silicone mold I made of the cape. That cape mold is about seven years old right now, and frankly, silicone doesn't last forever. The last pour I did of urethane ended up doing a TINY bit of damage to the mold, as mentioned in a previous post. It happened when I was doing some color tests, and the damage was done to the edge of the mold, where there wasn't even a diamond pattern. But the fact is, the mold is getting old and I fear that my next coat of urethane on it could end up doing some damage.

What I'm in the process of doing now, in conjunction with some color and process experimentation, is doing a preservation pull of the cape. I want to get a top quality pull out of the mold, so that if for some reason it dies, I have a copy of it available for making another mold. I know this may sound like overkill, but honestly if that mold gives out in the middle of a pull now, the project is pretty much cancelled.

Here's where the mold stands as of the last round of applications.

I really should have reviewed some older blog posts before taking on this task, as I had to re-learn my process for applying the latex to the mold. It's not as easy as you might think, and there is some mystery to the technique necessary to get a good surface out of this. Though the color in this photo is not at all representative of the actual color, you get the general idea. This is three coats of latex.

For reference, this is the color I am using. If you took this color and painted it on a white wall, it would be exactly the color I want my cape outer shell to be. However, when this paint is mixed with the latex that I am using, the stuff from Motion Picture FX Company, it lightens it up a little. Heck for all I know the only reason it appears lighter is because it's still pretty thin. Maybe I just need to add more paint to the latex.

At this point, it's still just an assumption that this process of mixing off the shelf paint with latex rubber is even going to work. It might not. The paint may very well not bond properly with the latex rubber. Who knows. Hence the experiment.

Kind of funny that this is paint I purchased when I was living in Ohio. Sheesh, that was like four years ago. What a wreck.

Here's the stuff.

I think the plan is to mix up one more serving of this latex, apply it to the cape, and then apply a fabric backing to it. Honestly, I don't even think this will be a usable cape, as the first layer of latex was a real mess, due to me forgetting my application technique. But as with every time I do anything on this project, it's a learning experience.

I don't remember if I posted this before, but it seems relevant given that my post began with the belt. Check it out and let me know what you think!

Sunday, August 9, 2015

Superman Returns Costume - R&D Update

I've discovered that it's important to start a blog post out with an attention grabbing photo, as that is the one that will be displayed if this post is linked to a social media site or something, so I will begin with this picture:

What you are looking at of course is the chest emblem and belt from the Superman Returns costume, in this case these are straight out of the molds. Off to the right is a piece of cape fabric. It's like all the magic is happening in one place!

Let's dig into the meat and bones of this post, which is an update on some R&D work I've done lately on the cape.

For reference, this is the new product I got from Sil-Pak that I am experimenting with. It's called RU-420.

It's VERY soft, with a 20 shore hardness BUT it's an opaque, light amber color, which is very interesting to me.

No surprisingly, when I mix Sil-Pak pigments with it, I get very predictable and nice results.

To demonstrate to you, dear reader, how well the pigments work with it, allow me to wow you with this photo. What you are looking at is a test pour I did of RU-420 into a scrap mold, surrounded by all of the pigment tests that I did a few days earlier, using VytaFlex40. Now don't get me wrong, I'm sure much of the problem is me, but what this picture clearly reveals is that I was able to mix together a very respectable red using the RU-420 as a base, whereas I was unable to achieve good results using VytaFlex. Take away from that whatever you will.

As I don't really have a mental guage of how shore duromteres evaluate to real world hardness, I thought it was a good time to do a test pour of the new stuff into the Superman Returns chest emblem. With the color looking as good as it did, I thought it might make for a nice new display piece, along with teaching me what 20 shore hardness feels like.

I had a bit extra in the pour, and that's what is sitting all over the top of the mold.

In a separate brain storm that led to a test, I wanted to try my hand at getting a solid color match across multiple pours of urethane. The secret, of course, is to mix up one batch of Part A with pigment, and then split that into two parts when mixing it with part B. So lets say your mold requires 200 grams of urethane. And your urethane mixes at a 1:1 by weight ratio. You would pour up 100 grams of part A, and then pigment that to your desired color. THEN pour 50g of that into a cup, and mix it with 50g of part B. Then pour that into the mold. Once that has cured, mix up the remaining 50g of part A with another 50g of part B, THEN pour that into the mold.

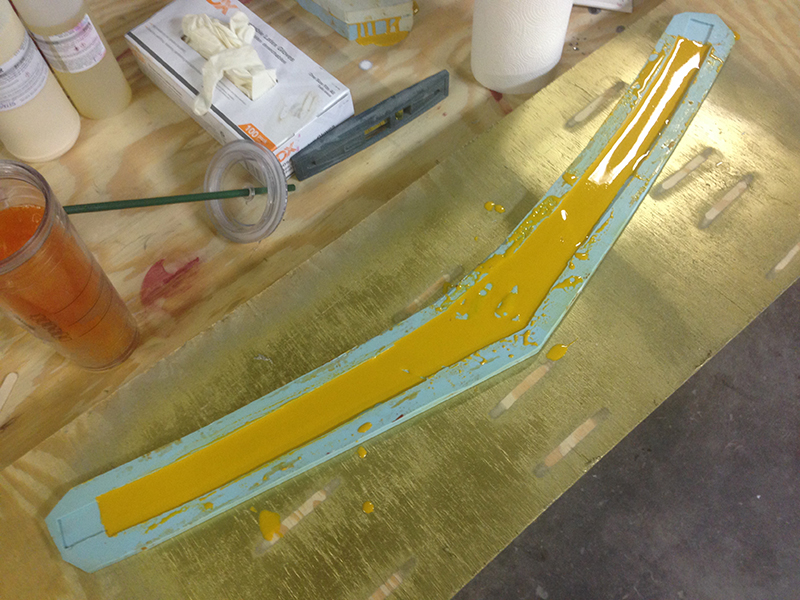
Here is my mold for the belt, half filled with pigmented PMC-780 Dry.

And here's the mixing cup, still loaded with a bit of pigmented part A.

Now what the loyal reader SHOULD be asking themselves is this: why would you want to do multiple pours of urethane into a belt mold. Why not just do it all at once?

The answer in this instance is two-fold. First, I want to embed in this casting some yellow belt webbing that will be used to close the belt up at the back. Once the first pour cures, I lay the webbing in place, and then pour the next layer on top of it. That way, the webbing is totally encased in urethane. Because the two pours of urethane are going to bond with each other VERY strongly, the webbing will therefore be suspended in the middle of. You may be asking yourself, why not just dip the webbing into the urethane as it pours, and just do it all at once? The answer is that you cannot guarantee the positioning of the webbing in that scenario. I've done that method before, and sometimes the webbing sinks to the bottom of the mold, and ends up being visible in the pull once you de-mold. So by pouring in a layer first, you guarantee that your belt will be pretty from the front, and that the webbing will not be visible. This is also much stronger than say gluing the webbing to the back of the belt.

The second reason for doing this is really just as a test. I wanted to see how the colors would turn out, how the bond would be, etc. When I finally get around to doing a cape layup, I doubt I will be able to do it all in one pour, so by testing this I am able to see if I will be able to do the cape in multiple pours. Which I now believe I will be.

Which brings me nicely to this next picture, in which you can see the belt with the webbing embedded in it.

Nice, Right??

On the right in the above picture is the back side of the chest emblem mold. There are two molds necessary to build a chest emblem. One is for the yellow back plate, and another is for the main "S". What you are looking at is a pull of the back plate sitting on top of the back side of the "S" plate.

Which brings us full circle, and back to the picture that I started this blog post with.

The big take-away here is that 20 durometer urethane is WAY too soft fo the chest emblem. It's extremely soft and delicate, and kind of barely holds it's shape. While this test was extremely valuable in terms of coloring, it did not produce a useable chest emblem.

This is a closeup of the SECOND belt I poured. Why did I pour a second one? Because in my rush to do the multi-pour pigment test, I forgot to powder the mold. As a result, I had a few little air bubbles in the thing. And for those of you who are familiar with my work, I don't do air bubbles.

It also gave me an opportunity to perfect my pigment mixture for the belt.

The belt on the top is my second pour. You can see the difference between the two. The first one took on a bit of an avocado tint, which is not cool.

With those test behind me, and me hot on the trail of some new discoveries, I did a text mix of PMC-720 and tried mixing up a good, deep red using the new assortment of pigments I had purchased from Sil-Pak just the other day.

To skip to the punchline, the red I got was AMAZING!!! EVEN BETTER than the red I achieved with RU-420, which I was already completely pleased with. If you look at the picture below, you can see where I poured this new red mixture on top of the mold so that I could see the difference between my new red and the one I had mixed previously.

The reason this is important is because it re-invigorates my interests in the PMC line of urethanes for the cape. While I originally dismissed PMC780 as a choice for the cape based on the fact that it cures to a translucent dark amber AND I was unable to mix a satisfactory shade of red AND I was unable to brush it into the mold, my recent discoveries of mixing in cabosil/Thixo-HP and the new batch of pigments I've acquired from Sil-Pak have me revisiting this material. In fact, I dare say that as of this moment, I think one of the PMC urethanes will ultimately prove to be the one I use for the cape shell.

For reference, this is the latex that I use on my cape mold, WHEN I'm doing latex tests.

Let us now turn our attention back to the cape, where more experimentation has taken place.

Sadly, I ran out of Douglas and Sturgess "Thixo HP", which is the cabosil replacement I have been using for a while now. Really fantastic stuff. I turned to a batch of stuff I got from Smooth-On, and I'm sad to say it just wasn't the same. It didn't mix in half as well as the Thixo HP, and there were clumps. Not fatal, but I am definitely going to back to Thixo HP right away. I ordered a bunch more from the D&S website just the other day. If you're curious, give them a visit.

http://www.artstuf.com/

Sadly, their URL and website are from 1998, but hey what they lack in internet pizazz, they make up for with great products and really knowledgeable folks!!!

It was time to experiment with the RU-420 on the cape. I mixed up a small batch and threw in some of the Smooth-On thixo, and decided to mix it up with a little blue this time instead of red. Aside from the clumpiness I mentioned earlier, and the fact that the mix ratio is different than the Thixo HP, I think the first tests went fairly well. Here's the first attack:

As you can see from the close up, the first layer is not totally opaque, which is to be expected. You can see the edge of the differently colored mold through the layer of blue urethane.

And that's where we leave things for this update on the Superman Returns suit. Lots of stuff learned, and I cranked out a chest emblem and a couple belts. All good.

In other news, my Man of Steel suit from UD Replicas is here. It's absolutely stunning, by the way. Please check out UD Replicas and my good pal David at their website:

http://www.udreplicas.com/

Also in the pipeline now are a couple of pieces from the new Supergirl TV show. I very much like the new costume, and I'm working on the chest emblem right now. I have artwork all drawn up, and am sending it off to the laser cutter shortly. Once I have the laser cut pieces, those will be molded and urethane pieces will be produced.

That wraps it up for this update. That's what's going on at the workshop right now! I expect this next week to be a very busy and productive one, and hope to have more cool stuff to show off. I really want to get a cape out of the mold soon!

Friday, August 7, 2015

Superman Returns Costume - The Project That Simply Will Not Die.

Regular readers of my blog will know that the Superman Returns costume build has been the longest running project here. I started it in maybe 2007. Much of the delays are caused by me becoming frustrated. There are MANY technical challenges to getting this suit finished. Many.

The thing that keeps getting in my way is the cape. As a quick review, the cape is made up mainly of two parts. There is an outer shell, which is made out of some kind of flexible, rubber like fabric. It's made up of tons of tiny micro diamonds, or pyramids. Attached to that is a big piece of fabric. To keep things interesting, the fabric is ombre dyed, taking it from a bright crimson red at the bottom, to a deep red/brown near the top. There's really nothing simple about this cape. And somehow, the two separate layers are miraculously held together.

The good news is that I have a mold taken from a screen used cape, so the micro diamond pattern is on lock down.

From there on out, the challenges begin to pile up.

By my estimations, the outer shell must be made of either latex rubber or urethane.

My search for the right type of latex rubber took me in many directions. I ultimately found a product which dries relatively opaque, and does the service of NOT pulling back from the silicone mold when applied.

And that is a summary of the two main challenges when reverse engineering the outer shell. The material I'm looking for will be opaque when cured, will not pull away from the silicone, can be pigmented, and will be fairly light weight. Though that may sound like a reasonable list, it turns out it's really difficult to find something that satisfies all of those criteria. TRUST ME. It's not easy. I've spend many, many dollars experimenting with materials trying to get this right. It ulimately came down to a matter of compromise. It did not seem possible to find one product that did all of those things, so I had to chose which one I could live without.

And that frustrated me, and that kind of made me lose some traction on the project.

For the longest time, I was dead set on using latex. It's very inexpensive, is easy to work with, and with a little bit of experimentation, I was able to get a color that I was mostly satisfied with. It wasn't a perfect color, but to the untrained eye it would certainly pass.

BUT then I learned that when the latex I had selected, based on it's properties of opacity and tenacity, fades significantly when exposed to UV radiation for any length of time. Which means it's essentially useless.

Therefore, I switched my plan of attack to urethane.

Which also presented it's own series of challenges.

UNTIL...

And now we get to the heart of the story, which also serves as a lesson in tenacity. I was at Reynolds Advanced Materials, my local Smooth-On distributor, and was asking questions about different types of urethanes. I'm very familiar with many of them, not so much with others. I was talking to a gent there about their Vyta-Flex line. He informed me that it's like the newer version of their PMC line, which I have been using for years. Seeing as how vytaflex cures to be a near opaque, light amber color, I found this very interesting. PMC cures to be a dark, medium translucency amber, which is OK if I have some really strong pigments that I can use to block it out. Anyhow, I'm talking to the dude, and he mentions in passing that their Brush-On urethanes are the same as Vyta-Flex, but have cabosil mixed into it.

Hmmmmmmmmmmmm.

Brush-On was originally what I had pegged as the urethane to use on the cape, as it's the ONLY one that would lay flat on the silicone when I brush it on. ALL other urethanes I tested would bead up, or pull back from the silicone, rendering them useless. There was nothing I could do, no technique I had found, that would let me use any kind of urethane in the mold other than Brush-On.

Could it be that the secret differentiator was something as simple as cabosil? For reference, Cabosil is a super light, silica product that is basically a thickener, or thixotropic agent. I've talked about it elsewhere in this blog, but for different applications.

I picked up some vyta-flex and ran back to the workshop.

I mixed up a tiny batch, threw in some cabosil, and went to work on the mold. Sure as pooh, it worked!!! I was able to brush on vyta-vlex in VERY thin coats, and it would lay flat on the mold. This was miraculous.

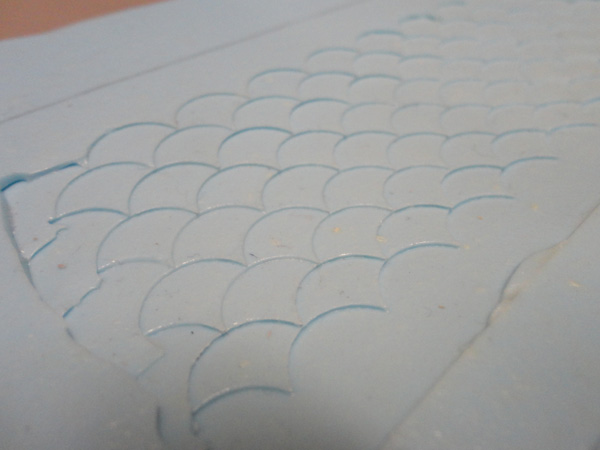
I pulled out the old mermaid scale mold I used previously as a test bed for this project, and ran a couple dozen tests. Different urethanes, different percentages of cabosil, and finally found a formula that worked. I felt like I was back in business.

After running a couple of weeks worth of tests, I decided I had what I needed, and it was time to bust out Ye Olde Cape Mold and give it a shot on the real thing.

The mold has been crated up for a couple of years now, ever since I moved back to CA from Ohio, now that I think about it. As I was clearing out the shop and prepping for the uncrating, I became terrified that the mold had somehow decayed during the time it had been crated. Or that the mold had been resting on some uneven surface for the past 2 years, and had gotten creased or distorted.

Here's the crate, brought out from behind the previous locations of some supply shelves.

Fortunately, my foresight paid off. When I boxed up the mold in Ohio, I brushed in a few layers of latex to help protect the silicone. I was also smart enough to lay some butcher paper on top of it to keep the cardboard boxes from dinging it up. Long story short, the mold was completely undamaged by it's long term storage.

Earlier I spoke about the micro-diamond pattern on the cape exterior. Here's a closeup of said diamonds.

With the mold back in action, I got to testing the urethane and cabosil mix on the cape mold. It works EVEN BETTER than it did on the mermaid scale mold. It was going down extremely thin, and after just a couple of coats, it was completely opaque.

Even better, once I pulled it off the mold, it was extremely light and flexible. I must confess I was completely surprised by how light and soft the hand was on it. Everything is looking really good.

Back at the mermaid scales, I was testing some techniques for getting fabric to stick to the outer layer. I ended up just rolling on another thin layer of urethane and cabosil mixture, and then laying the fabric down on top of that. Worked like a charm.

The long pole in the tent from here on out is really the color. It's very important to get this right, or as close as I am capable. I set up a series of tests to try to determine the right recipe for pigmentation. I have a number of different pigments from a variety of companies. My hope is that a combination of them will get me the right results.

I started with a little scoop of sil-paks CU Pigment in each of my test cups. Sil-Pak's stuff is great because it really impregnates the urethane and makes it opaque. It serves as a good base for adding in other pigments.

From there it was just a matter of mixing in other colors. I added some UVO pigments, some so-strong tints, some douglas and sturgess pigments, and anything else I could get my hands on.

Then I just scooped a little bit out and added it to the cape.

Sadly, none of the colors really ended up being what I needed, but I learned a lot about how the colors interact when mixed. I think I've also noticed that the colors change non-trivially once the urethane is cured. For example, sometimes a color with a very bold brown tint will turn out to be completely red once cured. This makes mixing the perfect color very difficult, but I feel confident that with another six to eight years of experimentation, I will get there.

Hah just kidding!

So yeah, work continues. And honestly, I have to say this has been one of the most fun and fulfilling projects I have ever taken on. I have learned SOOOOOO much from this project, have met some great people, and have gained knowledge of so many new products and vendors.

One of the most recent things I did was an adhesive test. I was operating under the assumption that there might be an adhesive out there that I could use to join the outer shell to the inner shell. The reason I'm looking for this is because the process of attaching the two via a coat of urethane is problematic. Too thin, and they won't hold. Too thick, and you'll get bleed through. Basically, wet spots. I have already tested and dismissed a number of adhesives, but found a few more that I hadn't tried before. The basic problem is that the adhesive is either too strong and as a result corrodes the urethane, or it's too weak and won't stick at all.

Sadly, all of the candidates on this round of testing fell into one of those categories. As mentioned earlier, I am currently set on using a layer of urethane to join them, but I still hope that a magic adhesive will make itself known.

Hopefully some more updates will follow soon, and the cape will get closer and closer as the days go by.

Thursday, February 2, 2012

A Days Work

The Superman Returns project is not dead. Just moving REALLY slowly. Tonight I had cause to do some experiments with some really nice pigment I got a while back from my friends at The Bronze Armory. This is a VERY close match to the burgandy seen on the cape. I'm quite happy with it, and expect to use it in the future. I spoke to a machinist friend a while back about getting the diamond plate custom cut, and he said it's totally feasible. Just expensive. Story of my life.


I'm also working on some stuff for an upcoming project. I made a few molds today, and also did some stuff with urethane. I don't want to give too much away, but the three disks are a set of experiments I'm running. I'm not sure which one will turn out best, but we shall see. This is a new technique for me, and I'm not totally sure how it will turn out, but because of all of the work I've done with Urethane over the years, I have a pretty high degree of confidence that this will work out the way I want it.

Friday, September 16, 2011

Very Exciting Urethane News

After a couple of years of experimentation (though not consistently!) I think I've really had a breakthrough on the Superman Returns cape front.

If you'll recall, the big problem I've really run into is finding a suitable material to use for the outer skin of the cape. The part that is textured with a micro-diamond pattern.

I've tried a dozen or so different materials, ranging from various mixes and viscosities of latex rubber, to a bunch of different brands and shore hardnesses of urethane. It's extremely frustrating. Each one of the materials I try has its advantages and disadvantages, but none are able to produce the results I want. I came really close with a certain brand of latex rubber and a mixture of pigments, but it proved to be a bit transparent (necessitating multiple coats), extremely time consuming and error prone, and worst of all, when exposed to sunlight it would turn white and powdery.

At San Diego Comic Con this year, I sat down for dinner with the very talented David Pea of Universal Designs, (the company that brings us leather motorcycle gear that happens to be identical to some of the most awesome movie costumes ever!!) where he shared with me some of his hard earned wisdom. He suggested a few different materials and a number of techniques that I should explore. I recently did some experimentation with leather spray that did not turn out as I hoped, but it led me down a previously unexplored path.

The summary is this. I picked up a kit of Smooth-On Brush-on 50 Urethane, thinned it with mineral spirits (as per the websites suggestion) and sprayed it into my molds with an airbrush. I experimented with both a silicone mold and a rigid (BJB 1630) mold. Here are some close up photos of the results.


It may not be entirely clear from the photos, but the end result is that the urethane coated the molds VERY evenly, and did not lift up or pull back from either substrate. This is amazing to me!!!!!

What remains is to test the opacity of this spray. I need to pigment a batch, do a couple layers of spray, and see how much light passes through. I really feel VERY encouraged by my latest developments, and this is really exciting for me. The urethane goes on VERY thin when sprayed on like this, which is just great. Yes, it will mean I have to do a number of coats, but that's really no problem. The fact that it currently appears to satisfy all of my requirements is enough to offset any labor expense I may incur as a result.

Part of me doesn't want to get too excited, as I have experienced so much failure with this project over the years. Still, with results like this, it's hard not to get excited

Wednesday, June 15, 2011

Superman Lives Costume

Also of interest today is something I stumbled upon while poking around youtube. This is footage of the development of ONE of the suits from Superman Lives, the aborted Tim Burton reboot of the franchise.


It's pretty frickin' awful, and I'm REALLY glad this movie did not happen. Still, it's interesting history here, and kudos to the folks at XFX for executing a really poor design so well.

Superman On Blu-Ray

I picked this up from Costco the other day. The main reason I got it was for the original beginning of Superman Returns. I presume it has him going back to the remains of Krypton. I've seen a shot or two of this from some of the early trailers, but have been waiting to see the entire sequence for years. I read in an interview that Singer chopped 45 minutes out of the entire movie. I'd like to see those 45 minutes replaced, though I suspect much of it was unimportant, or were plot points that didn't make sense after all was said and done.

Friday, December 31, 2010

FAQ - Superman Returns Costume Recipe

I get asked fairly frequently if I sell items from my blog or website. I do not. Well, Ok, sometimes I do, but I don’t make a habit of it. The truth is, the projects I am working on are for me. I’m not doing it for profit. Because I have so little free time, any I might find is dedicated to working on projects that I want to finish, not to building pieces for other fans and enthusiasts. I have been offered some decent money to sell things I show on my website, but always decline. I’m not in it for the money, and making something for someone else would simply take time away from making something for me.

With that said, I to tend to get asked a few of the same questions over and over again, so I thought it was about time to put together a recipe for how to build your own Superman Returns suit based on what is currently available.

For briefs, body suit chest emblem and cape, I recommend The Bronze Armory. They can be found here.

The body suit they sell is decent. It's not perfect, but it's VERY well made. Whomever their seamstress is, she/he does great work. A really well crafted suit. The colors are not quite perfect. The base blue is a bit off, and the diamonds are the wrong shade. The racing stripes do not quite match what is on screen, but they are still very nice. The diamond pattern is also not quite right. The inner diamonds tend to wander around within the outer diamonds, where on the screen used ones, their positions are fixed toward the top. The inks used for the printing are not the right type. With all that said, it's still a REALLY nice suit, and is the best one on the market that I am aware of. Please don't take my hyper-critical comments as dismissive criticism.

The briefs are sort of the same. The colors are off, and the diamond pattern is not quite right, but they are constructed very well, and are the best on the market. The cut is also a bit off. It looks as if they used a standard pattern for briefs, and didn't account for the low cut on the legs and low rise waist that was seen on the Routh suit.

The chest emblem is a direct descendent of the piece I own. It's the real deal, and it's very nice. For a while, they were selling a different chest emblem which was not right, but I think they have stopped selling those. Buy this chest emblem!

The belt is a fan sculpt, and is decent. It's not quite right in a number of ways, but it's the best one that is commercially available. A pal of mine named JBrown did a sculpt of his own which was more accurate, though he does not offer them.


For the cape, go to Ricky Broussard, of Ricky’s Custom Costumes. His ebay store seems to be closed right now, so contact him directly at rickyb574@bellsouth.net. I cannot confirm that this addy is current, nor if he is still producing capes.

Ricky is the ONLY person I know of that is producing a Superman Returns cape. As with the Bronze Armory stuff, there are a bunch of things great about it, and a few things that are not right. PLEASE keep in mind that my criticisms come from the perspective of someone who is attempting to recreate in EVERY excruciating detail the production made and screen used costumes. For the casual observer and costumer, and perhaps even the more sophisticated costumer, the pieces I describe here are absolutely wonderful, and even quite pricey.

Ricky's cape is heavy. It's made of what looks like a burgandy pleather or naugahide, lined with a cotton interior. The colors are actually really darn close. The inner lining is almost spot on to the brighter parts of the real deal capes, though he is missing the ombre. The outer skin is a good color, though it does not have the micro-diamond texture. The construction of the cape is also not right. Ricky sews his lining to the inside, and uses an under-arm strap system similar to the Reeve style Superman capes. It's VERY functional, but it's not accurae. There's also some kind of steel rod in the neck to keep the shape of the cape. Also inaccurate. After having dissected one of the real deal capes in person, and realizing how incredibly complicated it is, I have to give Ricky a great deal of credit for devising a creative solution to what is a very difficult look to reproduce.

For the boots, go to www.superheroboots.com. I found this place via a friend, and they were just starting to develop a Superman Returns boot. They had made great progress, but there were some details missing. I offered up ALL of the reference material that I had collected over the past few years, and gave them some pointers on how to make the boots better. They totally ran with it, and have produced a boot that exceeded my expectations. They're also working hard on a newer version that will include custom sculpted soles that look really amazing.I'm really impressed with the work they are doing, and I think this will be a huge asset to the small community of dedicated Superman Returns costume fans who are looking to put together a very respectable suit.

My only criticism of the boots they are producing is in the materials. They work with vinyl instead of leather. The good news is that this keeps the price WAY down, and makes them much easier to produce. Their boots do not include the micro S's or the inverse micro-diamond pattern that are found on the real deal boots. BUT, they do use two different types of textured vinyl to simulate the look. Again, to anyone but the most discerning collector, these will come across as very high end, well made boots. Which they are.

I think that about covers it. If you have any questions, or if something requires further explanation, please don't hesitate to ask.

Christopher Reeve Style Superman Costume
If you are looking for this suit, the BEST place to go is here. www.actioncostumes.com. Hands down, they make the best, most accurate suit ever. A few years ago, fellow Superman enthusiast Chris King collaborated with this company to develop the best Superman replica, using a confirmed screen used suit as reference. Chris painstakingly took measurements and photos of everything, allowing them their replica what it is today. If you order, you'll need to ask for the "CKing Version" of the suit, which is not advertised on their website. It is expensive, but if you want total accuracy, this is the place to go. I own one of their suits, along with the Reeve accurate boots, and it's just great.

Sunday, December 19, 2010

New Superman Returns Costume Details Discovered

A recent e-mail dialog with online buddy and fellow superman enthusiast Brian M. revealed a number of really startling discoveries about the Returns suit. Well, they were startling for me. Brian obviously already knew all about them.

It still surprises me how after studying this suit for a few years now, there are still surprises to be had.

Brian made a trip out to the Madame Toussaude's Wax Museum in NYC a while back, where they were proudly displaying a Superman Returns replica. Being the good samaritan he is, he took a number of good pictures, including of parts that were not readily visible. Below is a selection of those pictures, and some comments on why they are so interesting.

Let's start with a big one. What this picture shows is the seam on the trunks. There is only ONE seam on the trunks, and it goes right down the back side, through the crotch, and up into the front. I had always wondered why there was that little seam visible in front, on the lower part of the crotch. Now I know. There are no side seams. I originally thought the trunks were constructed like traditional speedo type things. One seam on either side, and another at the bottom of the crotch. I was wrong.


This is a closeup picture of the trunks that Brian took of the suit on display at Comicon in 2010. Wish I had been there. I like this picture because it shows the seamwork on the trunks, and also shows how thick the ink is. You can also tell that the diamonds are lighter colored than the fabric they sit on.


This picture shows something I had long suspected, but could not tell with absolutel certainty. The collar uses the same diamond pattern as the briefs, NOT the body suit. It's also on its side, which is interesting.


This picture is just pure gold, and I'm SOO happy that Brian shared it with me. It shows a couple of really interesting things. First, there are NO side seams on the torso. I always figured they just shifted the seams from the side toward the back, but here you can see they eliminated them altogether. This means that the torso is just one big piece of fabric, with the only seam being at the back, on the zipper. That makes construction a lot easier, but makes silk screening the diamond pattern a little more difficult. It means the screen will have to be big enough to cover the area for the entire torso.

But what's even better is that you can see the racing stripes on the back. That's amazing. Heck, I didn't even know there WERE stripes on the back until I saw this picture.


This is a great shot of the back of the arm, which shows how the strip snakes its way around the arm.


This picture is swiped from that french website that I linked to in a previous post. It is interesting not only because it shows the seam on the shoulder again, but also shows the placement of the velcro that was used to keep the cape in place.


Second photo from the french site, clearly showing the seam on the shoulder. I did not know there was a seam there.