Links to the latest videos will be at the bottom of this blog post.
First up, let's take a look at how the shop looks recently.
The main things worth noticing here are the fact that the shop is pretty clean, and I have organized all of my white boxes and tools and stuff along the back wall.
My three primary projects are pictured here. You can see the Tardis, the Harley, and the Batmobile. I took this pic shortly before I repositioned the batmobile into its current resting place.
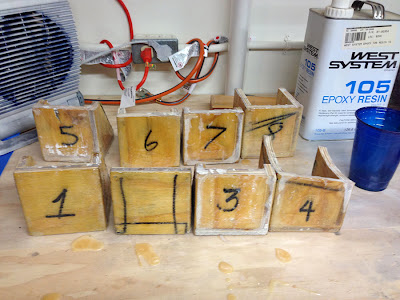
The big push this month has been to get the shell mounted on the body. To do this, I built these Bo-designed boxes for the inside of the shell. The idea is that we glass these into the shell, then build out metal support arms that go from the shell to the underside of these boxes. In between the box and the arm will be a rubber bumper.
This picture shows very clearly how the boxes have been installed into the frame. The one at the top of the picture is the most recent one I installed, and the one at the bottom was the FIRST one I glassed in. It certainly appears that along the way, my technique improved greatly.
Glassing in those front boxes was NOT glamorous work. In fact, it was pretty excruciating. Getting inside the car and up under the hood with only a tiny bit of room to crawl around was physically pretty daunting. Thank goodness I'm not claustrophobic. In order to do my work safely, I was wearing safety goggles and a head lamp, and I would often wear a respirator. Pretty snazzy outfit!
Few things better than having a girlfriend around the shop not only to provide assistance, but also to take pics of me when I'm unable to.
If you want to see some of Jackie's projects, check out her facebook page here:
https://www.facebook.com/HappyGoJackie
Even better, check out some of the Smosh videos she is featured in:
I had to make sure the shell was positioned VERY precisely on top of the frame, so that when we mount the arms to the boxes, it's in the right position. It was a very laborious task. Here you can see where I've put a level on the hood of the car to make sure it sits properly. Pretty darn close!
Work was interrupted for a while with a trip to NorCal, where we drove through some red wood forests, and also saw a pretty amazing sunset.
One of the tasks I need to attend to shortly is the chopping off of the top of that metal post that runs vertical to the frame.
It can (and does) get pretty cold in the shop this time of year. Here, Jackie is demonstrating a new technique she is experimenting with in order to stay warm.
A recent trip to Harbor Freight yielded this cart, which has already earned its money by keeping my welding torch and related supplies well organized and mobile.
This picture shows an example of the stacks of wood I am using to temporarily position the shell at its desired height.
Lastly is the most recent picture of the car. You can see blue tape all over the place where I have made notes about the height of the car.


No comments:
Post a Comment