Monday, September 29, 2014

Builder Bio

I was recently asked to write a brief bio of myself, re my experience as a maker of things. I wanted to post it here, since I thought it turned out decently.

When the first snap-hiss of Luke Skywalkers lightsaber hit the eyes and ears of a young and impressionable Matt Munson, a lifelong love affair with movie props had begun. My very first prop making effort was an attempt to duplicate Luke's saber using an atari joystick, a wooden dowel rod, and the testors model paints I had on hand. Humble beginnings indeed.

Since then, I have gone on to not only design, create, build and finish hundreds of movie and tv prop replicas for my own collection, but I have also made them for screens large and small. Some of my work can be seen in the upcoming feature film "Space Station 76" starring Liv Tyler and Matt Bomer. I built 3 robots and a robotic hand for that film. My work has also been featured prominently in many independent productions, such as "Batgirl: Spoiled" and "Aperture R&D". For my own collection, I have built a fully functional R2-D2 who walks, talks, and lights up just like the one in the Star Wars films. I built a full sized TARDIS, the blue police box made famous by the long running British science fiction television show "Doctor Who" and am currently knee deep in a replica of the Batmobile as driven by Michael Keaton in the 1989 Tim Burton Batman film.

I run the youtube channel "The Project Work Bench" where I produce tutorials, project walk-through videos, interviews with fellow builders, behind the scenes videos, and updates on my large scale projects. Tutorial videos often focus on a very specific task involved in prop making, such as fiberglass layups, or silicone mold making. One of my more popular series' shows a step by step walk through of my build of Batman's Grapple Gun from the Arkham Asylum video game. The series starts with a simple sketch on a piece of paper, and goes all the way through to final painting and weathering. I also keep a blog which documents at a different level of granularity some of my builds.

I work in a variety of media. I have found that the nature of the project typically dictates what materials will need to be used to complete it. I sculpt in clay, I weld, I machine. I fabricate using wood, plaster, styrene, fiberglass, resin, metal... whatever is needed. I sometimes make electronics to suit the needs of the project. I paint, I sand, I weather. I like to think of myself as an extremely versatile creator of all things interesting. I'll take on a project of any size, as long as it's interesting to me. As Yoda is fond of saying: "Size matters not". Even if it's something I don't know how to do, I find the learning process one of the most rewarding elements in any fabrication effort.

Tuesday, February 11, 2014

MattMobile - Rear Bumper and Support Arms

The day started with a quick trip to my favorite metal store, Industrial Metal Supply in Irvine. IMS is a sponsor of the MattMobile project, and I'm absolutely thrilled to have them on board. If you're in need of some metal or expertise, IMS is your place.

I had to pick up some telescoping rectangular tube steel for something that I will discuss in a future blog post, and also grabbed a few supplies while I was there. I got some replacement fiberglass cutoff wheels, some anti-spatter goo for the welding torch, and a piece of aluminum that I'm going to use on my DareDevil billy clubs. But the main purpose of my trip was to pick up some 2"X4" rectangular tube (14 guage) that I am going to use to fabricate a bumper.

As with previous work on the car, I'm sort of following in the footsteps of Tim Neil, who is building the BatBerry up in Canada. He fabricated a bumper using two pieces of 2"x2" stock, welded together. I figured I would skip that step, and just buy some properly sized stock. Also, it's a little thicker than the 2X2 stock I have on hand, so it'll be stronger.

A little gizmo that caught my eye while waiting for IMS to cut my steel to length is this magnet. It has both 90 degree angles and 45 degree angles on it, and the point here is that you use this to set up angles and hold steel in place while you weld it up. Getting 90 degree angles is pretty important to my build, and as you've seen from previous blog posts, I get mixed results.

If you don't have one of these, go get one.

With that said, the chore of the day was to fabricate a bumper and get it installed. MUCH easier said than done. I was experimenting with my new RIGID cutoff wheel saw, and frankly I'm not impressed. What it makes up for in lack of effort needed, it takes back by giving you pretty crappy and unpredictable cuts. The problem is that the blade deflects, leading to cuts that aren't where you want them to be. Still, it does some heavy lifting, which is helpful.

Fabricating the bumper should have been fairly straightforward, but I made a pretty stupid mistake early on and managed to drop an inch off my measurements prior to cutting. Which sucks, because I DID do the "measure twice, cut once" thing. I guess I need to up my game to "measure THRICE, cut once". The new magnet came in really handy for welding together the 45 degree cuts I made on the corners, and aside from being an inch two short, it came out really nicely.

However, I had to cut the thing down the middle and then add in an inch of material. I'm sure this weakened the overall structural integrity of the piece, but oh well. It is what it is.

Here you can see where I'm fitting the bumper into the frame of the caprice. The ends slide into the frame.

Once I corrected the problems of the missing inch, the bumper went into place very easily and nicely. It's also totally level. I was really happy with how it went in.

I was having some troubles with the welding torch, so I googled some troubleshooting stuff and ultimately made some changes to the settings which TOTALLY helped, and I'm now getting even better welds than I was producing before.

Flash forward, I welded in the bumper then welded in top of my welds some strips of steel to add strength. I then cut out a support arm for each side, and welded it from the outer tip of the bumper up onto the frame I've been fabricating inside the shell.

I of course did the same thing on both sides of the car.

Believe it or not, what you see in these last pictures is the culmination of 8 solid hours of work. Fabricating the bumper, installing it, cutting the support arms and attaching them is the sum total of today's efforts. All pretty cool. I noticed while taking pictures that I'm starting to accumulate some rust on my metal. Looks like it is the result of being handled by me. Once I get some more work done, I'll hit them with a wire brush and then give them a coat of primer to prevent further rust.

Thursday, February 6, 2014

MattMobile Roll Bar Progress

Not a whole heck of a lot accomplished today, though mainly because I ran out of gas for my welder. It was past 5:00 PM when it ran out, so I was unable to run to my local Praxair for a refill. I'll take care of that tomorrow.

My main focus today was working on the secondary roll bar. It was a little bit asymmetrical, and my brain just won't allow that. Two of the joints needed to be cut and re-welded, and one of the arms needed to be shortened. When I took this picture, there only remained a tiny bit of welding to do on the last joint.

I'm very happy with how this piece has evolved, though I think the takeaway message from it is that next time, I should just build a new one from scratch, rather than try to repair or modify an existing structure. Grinding down welds is REALLY time consuming and labor intensive. Not fun at all.

Wednesday, February 5, 2014

Han In Carbo Plexiglass Panels Cut and Purchased

While down in Lake Forest today on an errand, I stopped by my old pals at the Plastics place and got some plexiglass cut. They are super helpful and quick there, with the total trip lasting under 15 minutes.

If you'll recall earlier progress pics of my Han in Carbo, the side panels are missing and even worse, there are big open gaps there. This plex was cut to fit behind the side walls, and to cover up those holes.

Here you can see the plex I got today, along with one of my replica control panels.

Luckily, Vince Sanchez did a really great job of mastering the original fan made control panels I owned previously, and they were dimensionally very similar to the accurate Volvo panel. I will only have to modify the openings in the side walls slightly in order to fit the accurate panels. To be precise, I need to widen the small gaps where the lower tabs of the control panel goes. Each one gets and extra half inch of inward clearance. I will accomplish that with my dremel and files. Other than those two tabs, the panels fit quite nicely.

Next step will be to finish filing out the openings so that the accurate control panels fit, gluing in the new plex panels, then attaching the control panels to them. Probably only a day of work, but the trick will be finding the time to do it.

MattMobile Shell is Now Mounted

The really big news for this blog post, and perhaps for the build in a long time, is that the shell is now mounted to the chassis! It is now sitting in place without the support of wooden blocks or the lift. It's just... there. Right where it needs to be. A grand total of 10 separate support arms were built and welded into place. Once I got cooking on this process, it came together fairly quickly, but it was still a heck of a lot of work.

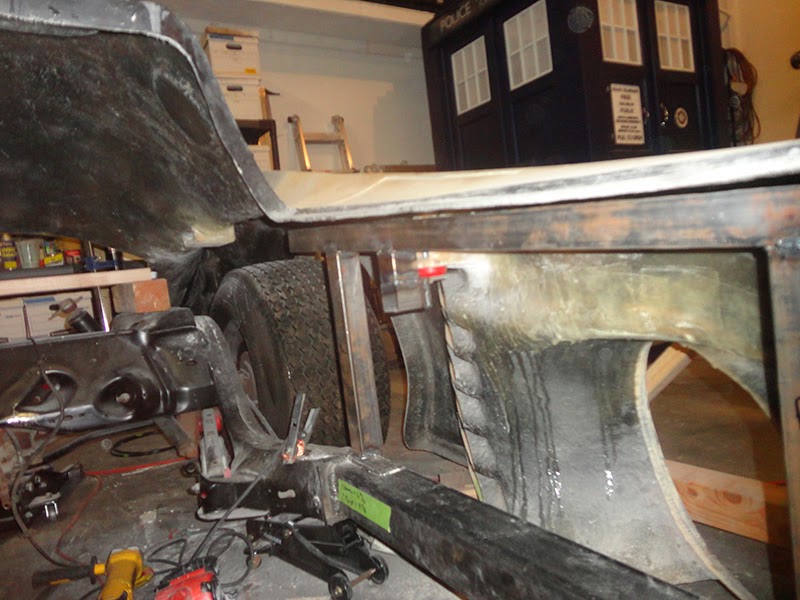
This picture shows the drivers side of the body, and please note how there are no wooden blocks under it. Once I removed all of the blocks that were PREVIOUSLY holding it in place, the body fell into position nicely. Previously, load bearing sections of the body would flare out as the weight of the shell sagged on them. now that all of the weight is being supported by strategically mounted points, the body falls much more handsomely.

Here's the view on the passenger side.

And here, if you look closely, you can see the final mounting points I built inside the shell.

In related welding news, here's a picture of yet another complicated jig I set up in order to weld together some seams on the rear roll bar.

Lastly, another todo item that has been lurking on my list for a while has been completed. I finally ordered replacement sets of lug nuts for all of my wheels. A bit of an embarrassing story, but when I purchased my rims from centerline, I got the wrong lug nuts. They had the wrong thread pattern on them, but it was only SLIGHTLY wrong, which means they fit. But I have since figured out the right thread size I need, and ordered replacements.

Oh, in other news, Bo The Welder stopped by to take a look at my work, and did NOT immediately denounce all of my welding and insist that I do it all over again. Though my welds are certainly not up to his level of perfection, it appears as if they are in no danger of falling apart.

During BTW's visit, we also strategized on how to make the hood stay in place once the seam line is cut. He came up with a great idea that uses VW style hood latches and catches. I have since ordered four sets online, and will begin work on that part of the build as soon as is possible.

Sunday, February 2, 2014

MattMobile Update: More Welding, More Supports

Greetings true believers!

Since my last blog post, I have had a really great time doing some welding and metal fabrication on the car. I can tell you this for sure: metal fab'ing is VERY time consuming, and results do not come quickly. Working with wood was SO much easier than metal. I'm definitely still on a learning curve, so please don't condemn my ugly welds too quickly :D

I had a few things on my to-do list for today, and after 11 hours of non-stop work, I almost completed them. My main goal right now is really to get the shell mounted on the chassis. That's it. Sounds easy. Right? There are five mounting points on each side of the car, for a total of ten. Each of the mounting points requires a custom made mounting post. Many of them are not mounted directly to the chassis, but are instead mounted to part of the infrastructure that has yet to be built inside the car. So it's a pretty daunting task.

Here you can see the drivers side mount. I finished building up the posts that will form the outer wall of the cockpit, and the mounting post is welded to that.

Same thing for the passenger side.

There are two remaining shell mounting points on the bottom arc of the fins, in what will be the trunk space of the car. In order to attach those points to the frame, I need to build out some structures back there. I started by modifying one of the roll bars that Bo The Welder had previously built. The basic shape was left in tact, I just added legs to it.

Here's the jig I set up on the table to help me weld it straight and flat.

Overall the results were pretty good, though not perfect, that's for sure. There's a little bit of bend to the arch, but I'm not too worried about that.

With that bar in place, I needed to build out some support bars. This is a view into the trunk from the drivers side. You can see a bar extending from the roll cage, running horizontally. That's the one I'm working on when I took this photo.

After a very long day of work, the only thing remaining is those two mounting spots at the base of the fins. I then need to fabricate a rear bumper, and add some reinforcement to the posts I built to hold the mounting points by the rear tail lights.

After that, I will lift the shell off the frame and weld up all the seams that I could not access while the shell was in place. I think there's a good chance I could get all of that accomplished at my next trip to the shop.

Thursday, January 30, 2014

Mucho MattMobile Progresso

Before I start this blog post, I must give a shout out and heads-up to a fellow Batmobile builder, Tim. Tim is building the BatBerry, and has been elegantly blogging the heck out of his build. If watching someone document both creativity and tenacity, then Tim's blog is for you.

http://batberry.wordpress.com/

I mention Tim's blog here for a few reasons, but the main reason is one of motivation. As followers of my blog will know, I've been depending heavily on my pal Bo (AKA Bo The Welder, AKA BTW) for not only engineering guidance, but also for welding. Hence his name. Bo has tons of experience with cars and with welding. I am entirely confident that the build would not have gotten as far as it has without his help and insight. I fear that over time, I've grown TOO dependent on Bo, which is an easy thing to do when dealing with a guy as skilled as Bo. The punchline here is that I have been scared to move ahead on my own, for fear that I will do it wrong. Therefore, I wait for Bo to have free time to help me.

However, After reading Tim's blog recently, and reviewing some of his earlier posts, I realized that he seemed to have done the opposite of me: he just plowed ahead with little or no fear of making mistakes. I have no idea of Tim's background, but he seemed just as new to Batmobile building as I am. Seeing him speak about how his welding skills have improved dramatically over time AND seeing his amazing progress on his build, I found myself wanting to jump in head first, let myself make mistakes, and then learn how to recover from them.

With that said, I've taken the instruction that Bo has given me with the welding torch, and just started practicing like crazy. I spent a few hours just welding together bits and pieces of scrap metal that were around the shop, and decided I would take a stab at building some of the mounts for the shell. The first two went together really well, though not terribly quickly. I was inspired by how good the welds looked, and how strong they appeared to be. My only regret is not realizing sooner that I needed to learn how to weld for myself, and not depend on anyone else :D

The first order of business yesterday was to lock the shell into its proper position. Honestly, I don't know why I didn't think of this weeks and weeks ago. I have spent probably 20 or 30 hours grand total running around the car with a ruler and a t-square, trying to get the shell positioned perfectly. And every time I get it into place, I knock it out the next day when getting into the car. It finally dawned on me to use some wood and clamps to lock the shell onto the frame. Again, not sure why I didn't think of this sooner. Here you can see the rear end of the car, and the type of contraption I came up with to keep the shell from shifting while I work on it.

This is some of the work I did yesterday, but didn't have an opportunity to add to my blog. I wanted to build supports for the front most anchor points, and the rear most. The two wooden boxes under the rear end got welded straight to the rear end of the chassis. I'm probably going to add some cross members for extra support here, but you get the general idea.

The following picture re-caps the work I did yesterday, and some work I did today. Yesterday I finished the front two mounting posts, and I took this picture today after I finished the second set.

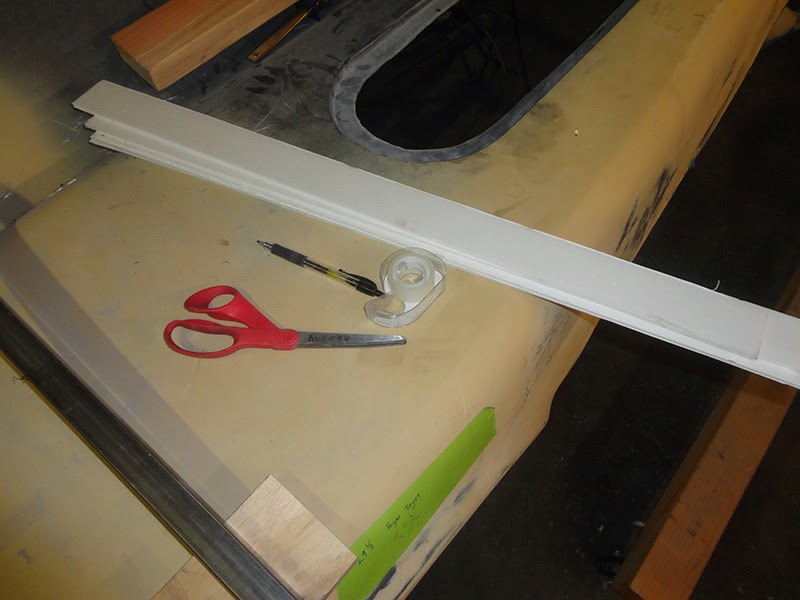
My short term goals are simple: Build out all of the support posts so that the shell can be mounted to the frame. Of course, that's actually a pretty tall order. For many of the posts, I was able to just take measurements, then cut the metal to the desired length. However, for a couple of the mounts, I'm going to build arms off the main cockpit cage. To start working on that cage, I want to mock it up using foam-core. I had already cut out a bunch of 2" wide strips, which came in handy today. These are my tools:

I learned recently that a physical mockup is a million times more valuable than just measuring stuff out. Little details are easy to overlook, and you can very easily get something wrong. A mockup helps you work through the problem at hand, and ensure that everything is considered. Here's my mock up of the drivers side posts for the cockpit cage.

One of the big challenges for me in the welding game is figuring out how to hold the metal in place while you do some welds. Here you can see a fairly intricate jig I came up with to get the post aligned, and held fast while I do some welding.

Skipping ahead, here are the two posts I installed on the drivers side today. Of course, in retrospect, had I done a little more planning, I may have done this differently. At this point in the build, my primary focus is completion, not perfection.

Here are the matching posts on the passenger side.

For reference, THAT is what I accomplished in a full 8 hours of work. I fabricated and installed the two mounting posts for the second-most shell mounting points, and also put in four posts for the cockpit cage. It doesn't really seem like a lot, but it was a TON of hard work. I want to say that once I improve my process, I'll be able to work faster, but I'm just not sure if that's true. The bottom line is that metal fabrication work JUST TAKES TIME.

After putting in a full eight hours of work today, it was finally time to clean up the shop. There were tools EVERYWHERE. Kind of stunning how much mess I can make. After the clean up, I jumped onto my ladder to take something of an aerial photo of the car.

Not a lot of visible progress, but TONS of stuff going on inside.

I think the coolest thing as of right now is the stability of the shell. Before, it would bend and flex and shift all over the place every time I got in and out of the car. Now it just kind of... stays there. Wild.

My goal is to get the shell completely mounted on the chassis by Sunday night of this week. Still plenty of time. (Famous last words)

Monday, January 27, 2014

Han In Carbonite Repairs and Upgrades

I recently sold my house in Irvine and moved to downtown Los Angeles, where I now have a crazy apartment with an amazing view. The moving company did some damage to my Han Solo in Carbonite, so I decided this would be a good opportunity not only to repair the damage, but also make some changes to the thing, and get it finished once and for all.

These first two pictures show how the project stands as of earlier today. You'll notice that the side panels are of course missing, and the edges are square, not rounded

Here's a couple examples of the type of damage that the moving company did. My guess is they just handled it pretty roughly, and probably dropped it. The seams around the edges popped out in a few places. Not unexpected, just a bummer.

Worst of all, a couple of his fingers were snapped off. Thank goodness the moving company was wise enough to save the fingers.

I started off with my trusty router, which I originally purchased with this project in mind. It has since proven super valuable in the Tardis build, and even on the MattMobile.

I ran around the upper edges a couple of times, and things were going really well.

Sadly, somewhere along the way, the router bit depth dropped a bit, and the cuts became too deep. Now I will need to go back along every inch of the thing and sand down the lip. No big deal, just more work than anticipated.

Here's a pic of neighboring FIDM, and a fountain.

And my view from the balcony.

I then routered the vertical corners. Due to some warping on the box, it didn't come out super even, but that's nothing a sanding block can't fix.

A couple of the nails that held the fiberglass casting of Han to the box I built had popped out. I hammered them back in, but they still need to be puttied again, and then painted.

Last item for the day was gluing the fingers back in place. I found out upon attempting this that a big chunk of the ring finger is missing, which will need to be reconstructed using putty. No big deal really.

That's it for today. My goal is to get all of the body work done by tomorrow, and then I can start reshaping the openings on the side to fit my screen-accurate control panels.

BTW, Meet MTW!

Bo The Welder (BTW) has been of immense help on the MattMobile project, and also spearheaded the motorcycle restoration project. I've learned a lot from working with Bo, and his knowledge seems to know no bounds.

It was time for me to finally get my feet wet in the world of welding, and that happened just the other day. Though completely ugly, I finally made my first few welds. I took some scrap 1X1 stock I had lying around, clamped it to the welding table and went to work. I kind of focused more on getting the feel for how the gun works, and that's what the big strips of welding goo are all over the place. Just getting familiar with the torch.

Hopefully over time I will improve :D

Dr Grordbort's Rightous Bison Kit