http://batberry.wordpress.com/
I mention Tim's blog here for a few reasons, but the main reason is one of motivation. As followers of my blog will know, I've been depending heavily on my pal Bo (AKA Bo The Welder, AKA BTW) for not only engineering guidance, but also for welding. Hence his name. Bo has tons of experience with cars and with welding. I am entirely confident that the build would not have gotten as far as it has without his help and insight. I fear that over time, I've grown TOO dependent on Bo, which is an easy thing to do when dealing with a guy as skilled as Bo. The punchline here is that I have been scared to move ahead on my own, for fear that I will do it wrong. Therefore, I wait for Bo to have free time to help me.
However, After reading Tim's blog recently, and reviewing some of his earlier posts, I realized that he seemed to have done the opposite of me: he just plowed ahead with little or no fear of making mistakes. I have no idea of Tim's background, but he seemed just as new to Batmobile building as I am. Seeing him speak about how his welding skills have improved dramatically over time AND seeing his amazing progress on his build, I found myself wanting to jump in head first, let myself make mistakes, and then learn how to recover from them.
With that said, I've taken the instruction that Bo has given me with the welding torch, and just started practicing like crazy. I spent a few hours just welding together bits and pieces of scrap metal that were around the shop, and decided I would take a stab at building some of the mounts for the shell. The first two went together really well, though not terribly quickly. I was inspired by how good the welds looked, and how strong they appeared to be. My only regret is not realizing sooner that I needed to learn how to weld for myself, and not depend on anyone else :D
The first order of business yesterday was to lock the shell into its proper position. Honestly, I don't know why I didn't think of this weeks and weeks ago. I have spent probably 20 or 30 hours grand total running around the car with a ruler and a t-square, trying to get the shell positioned perfectly. And every time I get it into place, I knock it out the next day when getting into the car. It finally dawned on me to use some wood and clamps to lock the shell onto the frame. Again, not sure why I didn't think of this sooner. Here you can see the rear end of the car, and the type of contraption I came up with to keep the shell from shifting while I work on it.

This is some of the work I did yesterday, but didn't have an opportunity to add to my blog. I wanted to build supports for the front most anchor points, and the rear most. The two wooden boxes under the rear end got welded straight to the rear end of the chassis. I'm probably going to add some cross members for extra support here, but you get the general idea.

The following picture re-caps the work I did yesterday, and some work I did today. Yesterday I finished the front two mounting posts, and I took this picture today after I finished the second set.

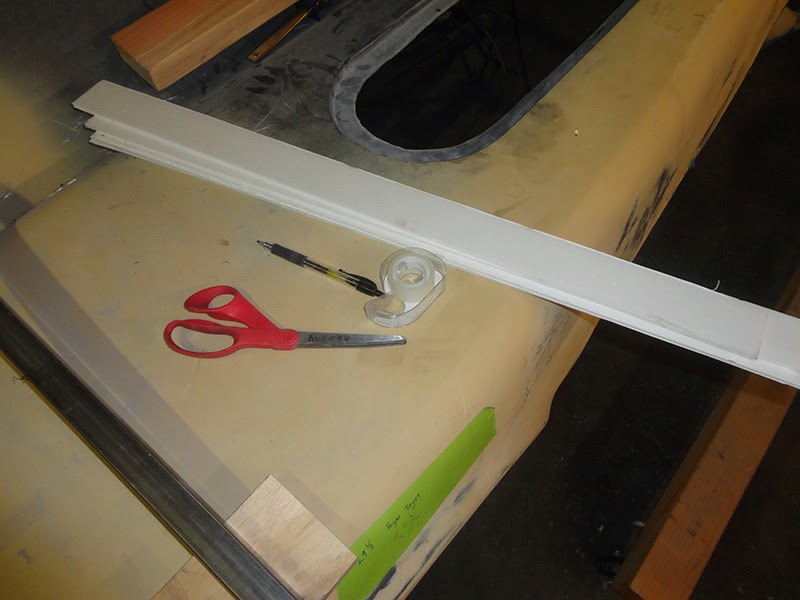
My short term goals are simple: Build out all of the support posts so that the shell can be mounted to the frame. Of course, that's actually a pretty tall order. For many of the posts, I was able to just take measurements, then cut the metal to the desired length. However, for a couple of the mounts, I'm going to build arms off the main cockpit cage. To start working on that cage, I want to mock it up using foam-core. I had already cut out a bunch of 2" wide strips, which came in handy today. These are my tools:
I learned recently that a physical mockup is a million times more valuable than just measuring stuff out. Little details are easy to overlook, and you can very easily get something wrong. A mockup helps you work through the problem at hand, and ensure that everything is considered. Here's my mock up of the drivers side posts for the cockpit cage.

One of the big challenges for me in the welding game is figuring out how to hold the metal in place while you do some welds. Here you can see a fairly intricate jig I came up with to get the post aligned, and held fast while I do some welding.

Skipping ahead, here are the two posts I installed on the drivers side today. Of course, in retrospect, had I done a little more planning, I may have done this differently. At this point in the build, my primary focus is completion, not perfection.

Here are the matching posts on the passenger side.

For reference, THAT is what I accomplished in a full 8 hours of work. I fabricated and installed the two mounting posts for the second-most shell mounting points, and also put in four posts for the cockpit cage. It doesn't really seem like a lot, but it was a TON of hard work. I want to say that once I improve my process, I'll be able to work faster, but I'm just not sure if that's true. The bottom line is that metal fabrication work JUST TAKES TIME.
After putting in a full eight hours of work today, it was finally time to clean up the shop. There were tools EVERYWHERE. Kind of stunning how much mess I can make. After the clean up, I jumped onto my ladder to take something of an aerial photo of the car.
Not a lot of visible progress, but TONS of stuff going on inside.

I think the coolest thing as of right now is the stability of the shell. Before, it would bend and flex and shift all over the place every time I got in and out of the car. Now it just kind of... stays there. Wild.
My goal is to get the shell completely mounted on the chassis by Sunday night of this week. Still plenty of time. (Famous last words)
1 comment:
Hi Matt,
Thanks for the shout out and all the kind words :)
Yeah, welding was a bit of an interesting new skill to learn. Like you I had most of my experience around wood working and fiberglass. But after talking to a few friends that weld for a living, their response was to jump right in and practice.
Over time you'll find what works and what doesn't along with what heat/feed settings to use.
I too have the challenge of trying to figure out how to hold things in place. It's tricky when you don't have a second set of hands to help out
Keep up the great work!
Tim
Post a Comment